Archive for the ‘At the Workbench’ Category.
24th January 2014, 06:26 pm
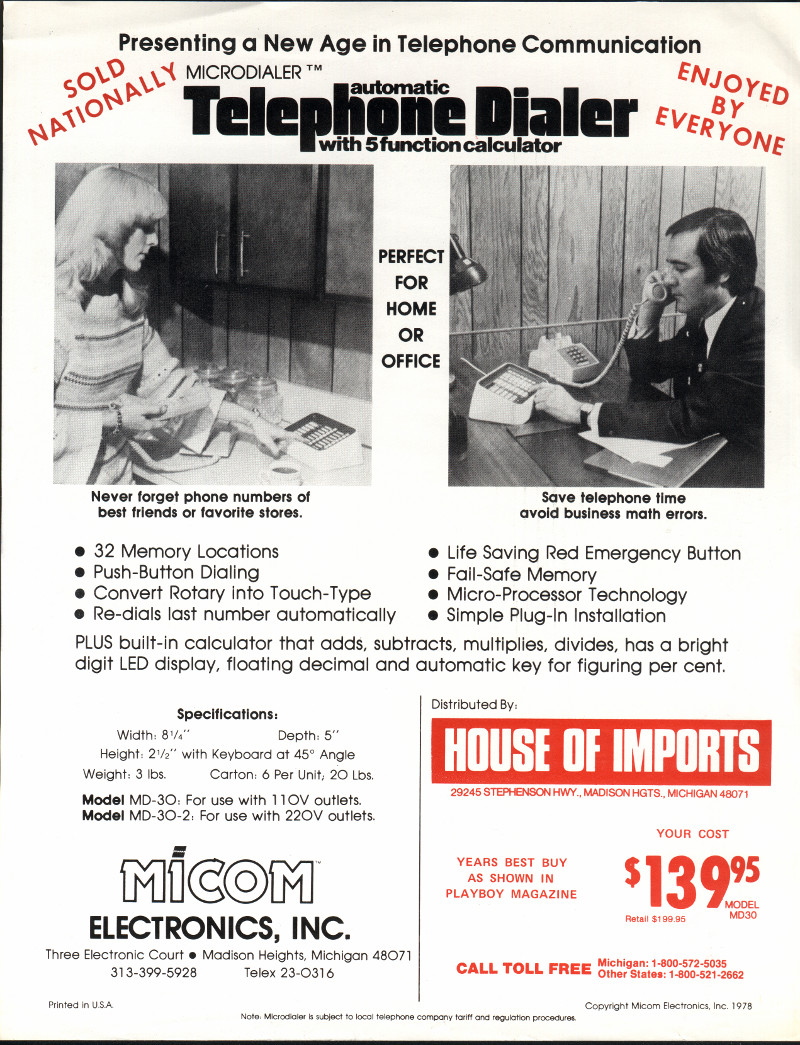
I found this old add while cleaning up the old papers I have tucked away. It dates from 1978 which in some ways, doesn’t seem that old to me. Looking at it, has made me think how much the world has changed in many small ways. This large add on device was made to do what your phone does all by itself now. The cost to the small retail shop was the $139.95 with a recommended retail of $199.95. That is way more than I payed for any of the phones I now use. The home phone is handy with every thing built in, but the cell phone is so amazing. You are always able to get in touch from any place at any time. I feel much safer when I am alone in the farm woods with my chainsaw or working out of sight around the farm.
In 1978 there was no internet, or home computers, I could go on and on listing things I use everyday that weren’t around but I think I better go back to going through my old papers and junk.
5th December 2013, 03:55 pm
A New Project
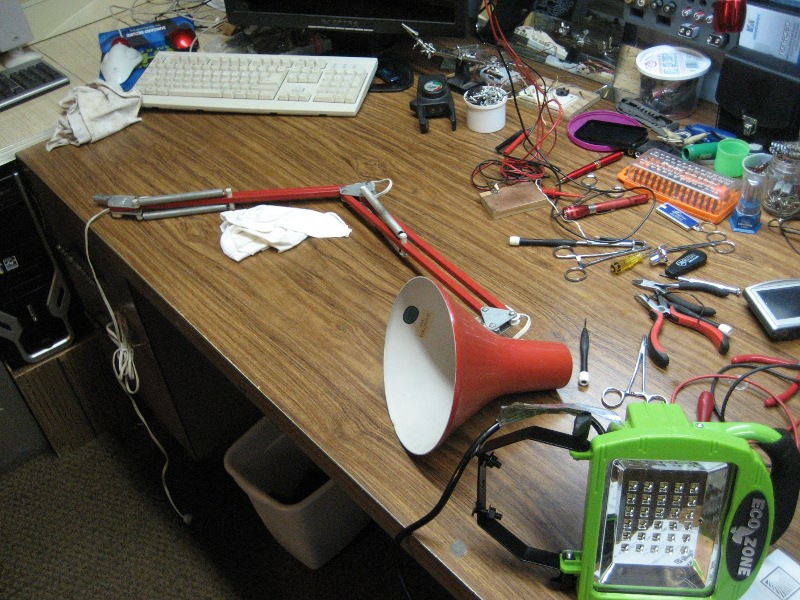
This is the new LED light I received from my son for my Birthday this year. I decided the best use would be for a light at my workbench. You can see in the picture the nice antique bench light I have been using. I have liked the position of the old lamp but it had a drawback in the fact the metal shade would get hot enough to burn your hand after a bit of use. As a matter of fact the plastic in the lamp sockets would fail after a 2 or 3 years of use. The 100 watt light bulbs I have been getting lately would also come apart where the glass bulb is bonded to the base. I had scored back in the early 1990’s on a batch of these lamps at an auction sale. I had sold some, used many, but now I was coming to the end of them.
The project was to mount the new LED lamp in a handy way. The lamp I was using at my desk made it appear that this could become a bit complicated. I dug out a bench light that had failed, so I wouldn’t destroy my working lamp. I was glad the pack-rat in me had tucked this one away.
The Planning
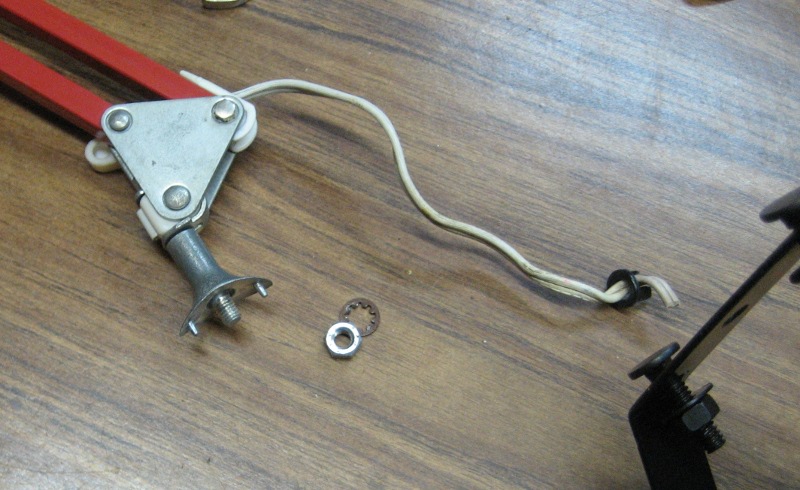
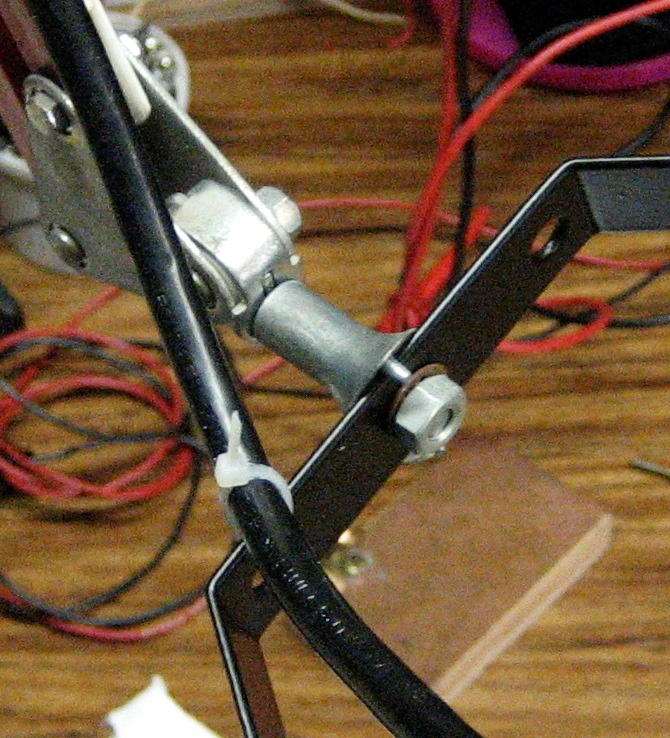
I had anticipated a job that would require the fabrication of brackets. As you can see from the next picture with the light housing removed the job became very simple.
Disasembled
Mounted
Finished Mount
I knew I had it made when there was a extra hole in the center of the LED bracket that was just the right size. You can see how the cast pins that fit into holes on the old light housing fit on each side of the LED mounting bracket.
This holds the light very straight, almost like it was designed to fit.
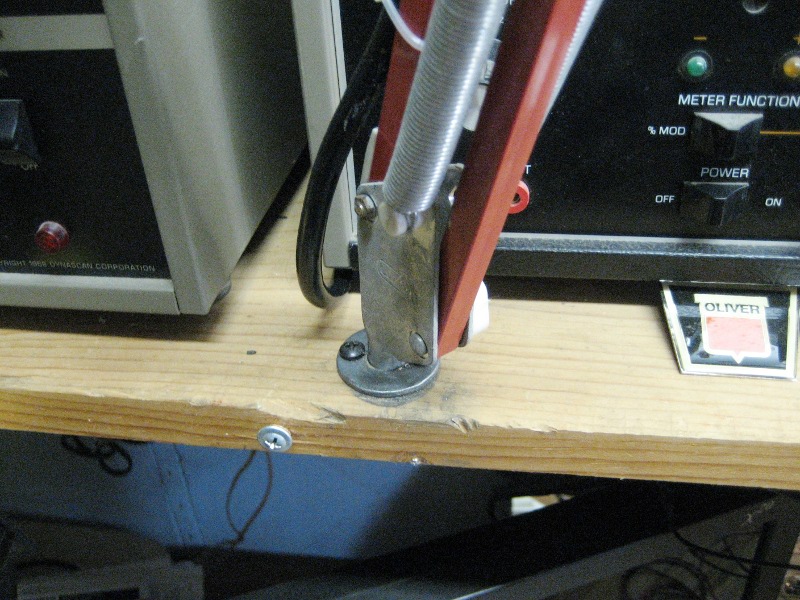
Shelf Mount
I just had to show the shelf mount I made a few years ago to replace the clamp on unit. It was simple a washer welded to a piece of tube, than drilled to fit the lamp base. I also drilled a hole to screw the bracket down. The clamp on bracket would work loose at times. It also took up room that you can see I need.
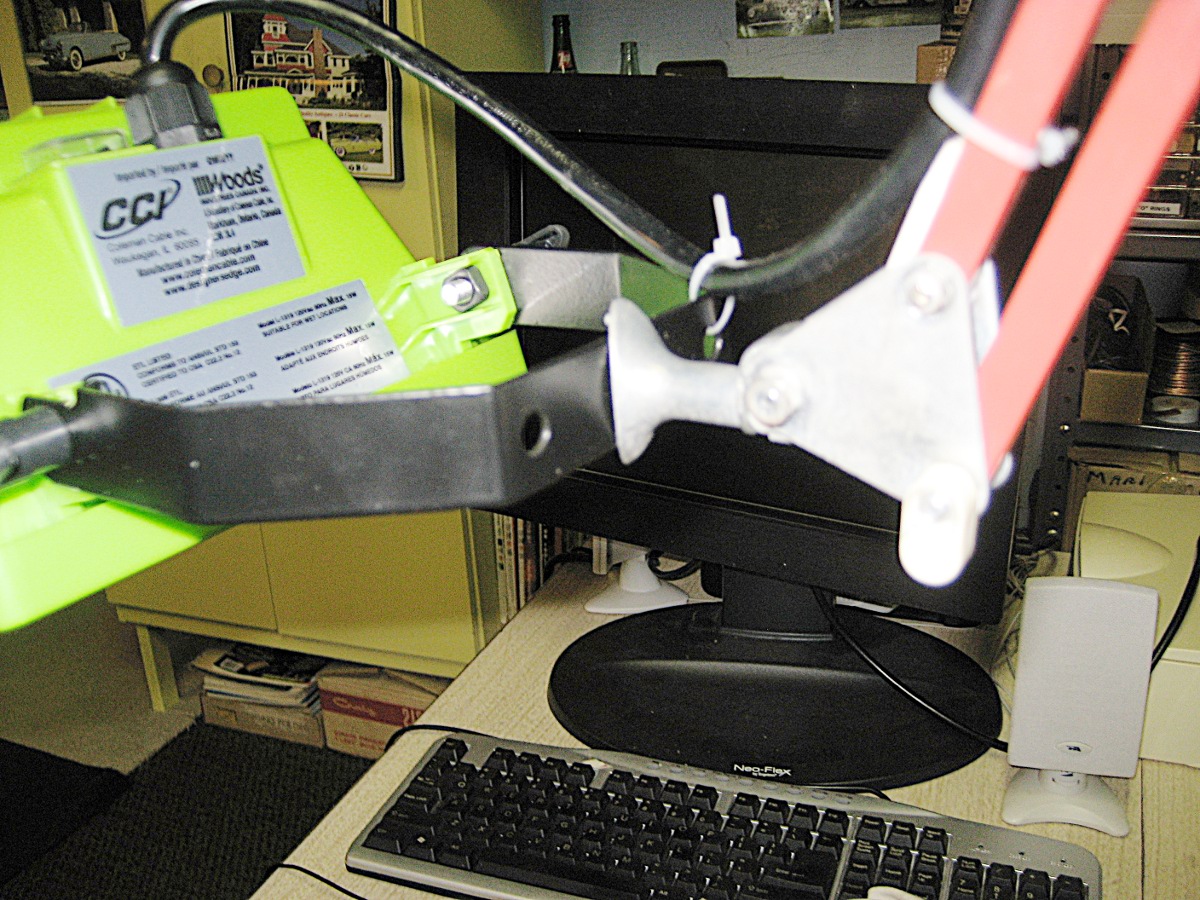
The Finished Light Unit
The last Picture shows the finished unit. I really like the bright white light for working at my hobby things. As the years slip by I find that I need more light to see small things and this really does the trick. My son did an excellent job of picking a useful gift for an old man. Thank You Jeremy
30th March 2013, 02:35 pm
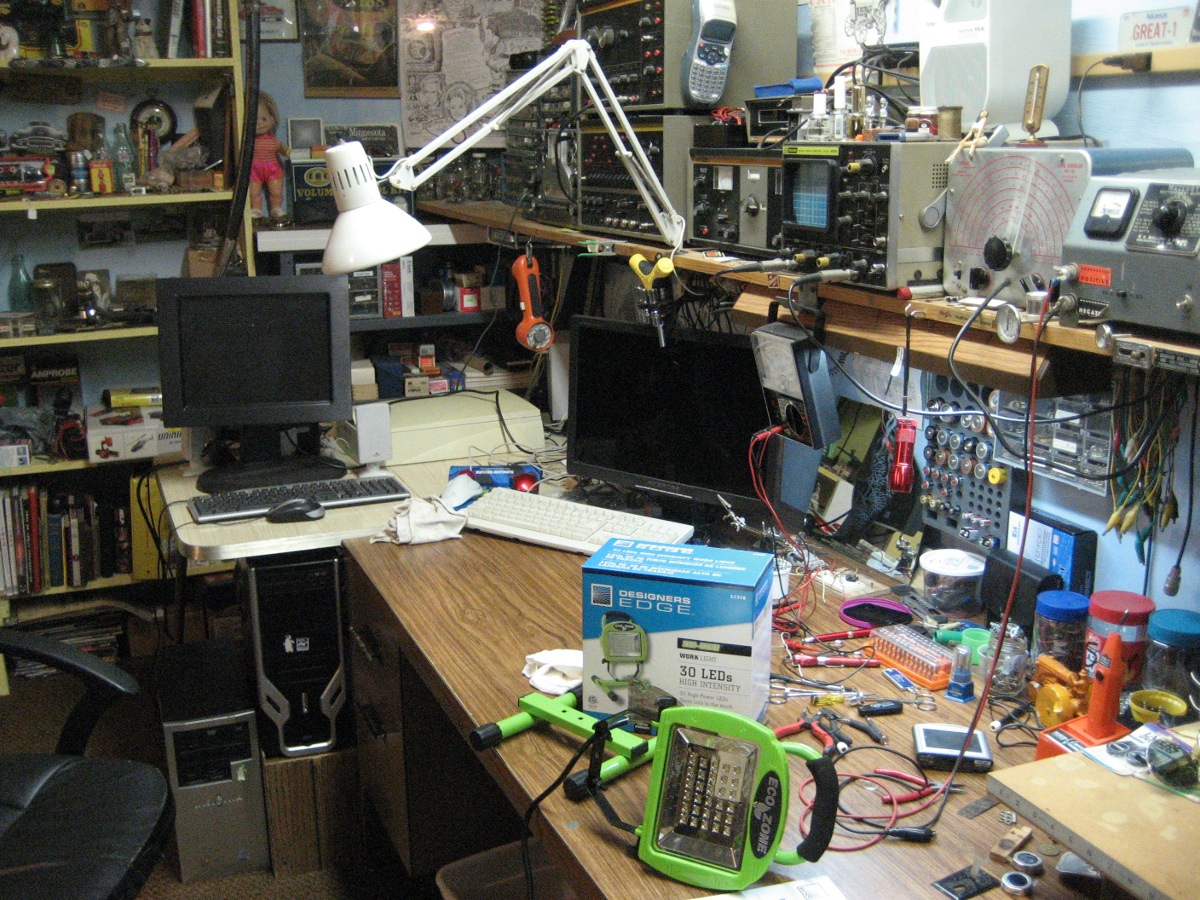
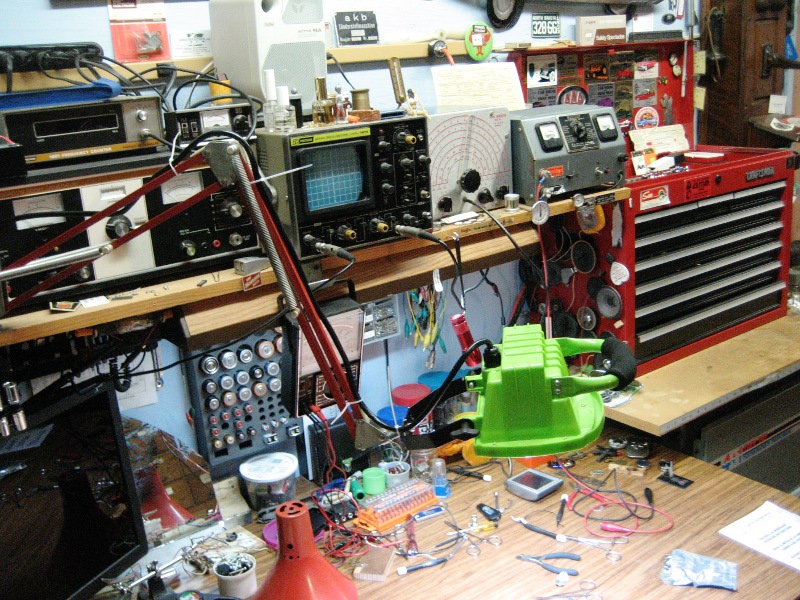
This is my workbench where I spend a lot of time when it is not nice outside.

My Workbench
My old DC power supply is something I use often. I believe it dates from the late 40’s or early 50’s. The cables that feed the power out, as you can see are very old. The insulation was real rubber covered with varnished cotton. Age has turned the rubber to a crumbly mess and the cotton outer has become very brittle.

This is not a good situation even at 15 volts. I have been putting this project off for a long time. It was one of those little jobs that are easy to forget about. It popped into my mind the other day, when I ran across some nice flexible wire when I was digging for something else.

Supplies

This should have been a real quick and easy project. Unfortunately one of the lugs I found was old and tarnished. This took a bit of cleaning to get the solder to bond. They are normally tinned and easy to solder to, but this one clip was different. I polished it down to the copper and used flux to get the job done. I soldered all the connections. Experience has taught me that a intermittent or high resistance connection can cause a lot of lost time.
The second lug worked like it was supposed to. The logical thing would have been to toss the first one but I wanted matching lugs of this size.
You can see I found a nice set of alligator clips with rubber covers. The wire cables and the clamps were the right colour. Handy to be able to tell the polarity at a glance.


Soldering the Clips

Almost Finished

Finished, Good for another 30 years
The job turned out nice and I had a fun doing it. The new leads are much more flexible and the insulating covers on the clips make them a lot easier to use.
Another good part is that I put stuff that was tucked away to good use.


