8th March 2023, 05:15 pm
Hey everyone, this is Jeremy, Rod’s son. Dad’s still working on things now and then, but he’s doing less welding and woodworking and general seat-of-the-pants engineering than he used to.
Apparently, i have taken the helm on that front, and while i’ve maintained a small and mostly abandoned blog for the last thirty years or so, i’ve never really settled in anywhere. facebook, twitter, linkedin, they’re all fine, but even mastodon requires relying on someone else’s servers to keep content available. Call me crazy, but i have a hard time trusting big business to do anything right — particularly techbros.
This is a long way of saying, i guess i’m migrating content off of my old blog to here, at least the stuff worth saving. SO, there will be a few more posts about things like IT stuff, 3d printing, and other asshattery. Also, more profanity, because i have more rough edges than my father.
Category:
greetings |
Comments Off on An additional Author
10th February 2017, 06:31 pm
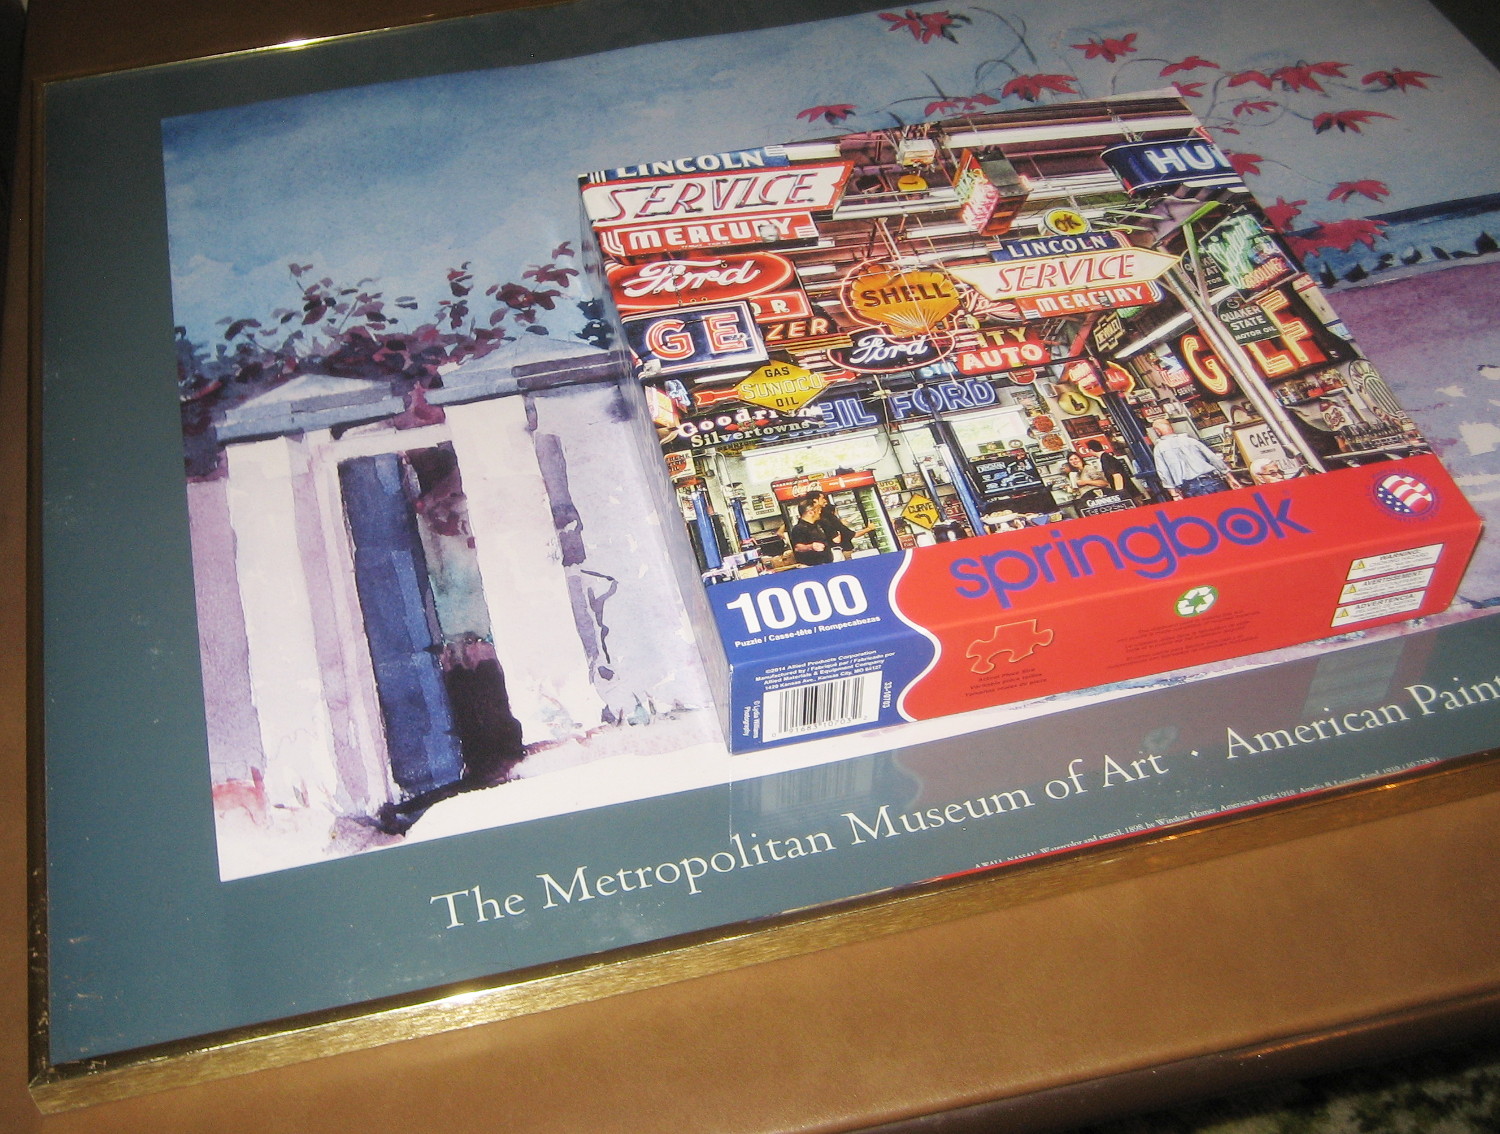
I received this 1ooo piece puzzle late last year, for my 75 birthday from my son. When I was young putting puzzles together was a major entertainment. I haven’t done many in recent years and seldom have I done ones this big. I liked the picture and I decided I would hang it in my shop.
How to do this took a bit of planning. I searched my collection of old frames and backing material but didn’t find what I wanted, so that slowed me down. Then I had a couple of problems come up in my old house that used up some of my time. Then with Christmas coming even more of my time was gone.
I didn’t get the project moving till New Years Day. My wife brought me a fancy, old large picture she had tucked away. It was very nice, but the picture had faded. It was the right size with glass and a metal frame.
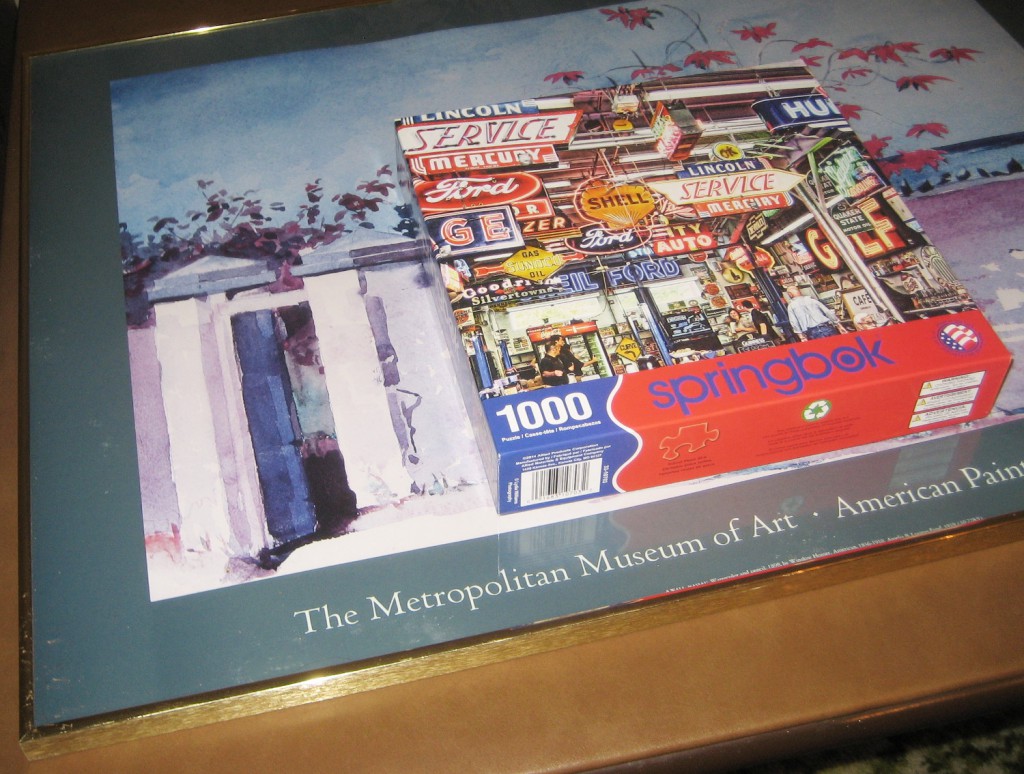
Birthday Puzzle on Old Picture
A very nice thing was, the frame was put together with screws, so it could be disassembled and assembled easily. Also the smooth surface was nice to assemble the puzzle on.

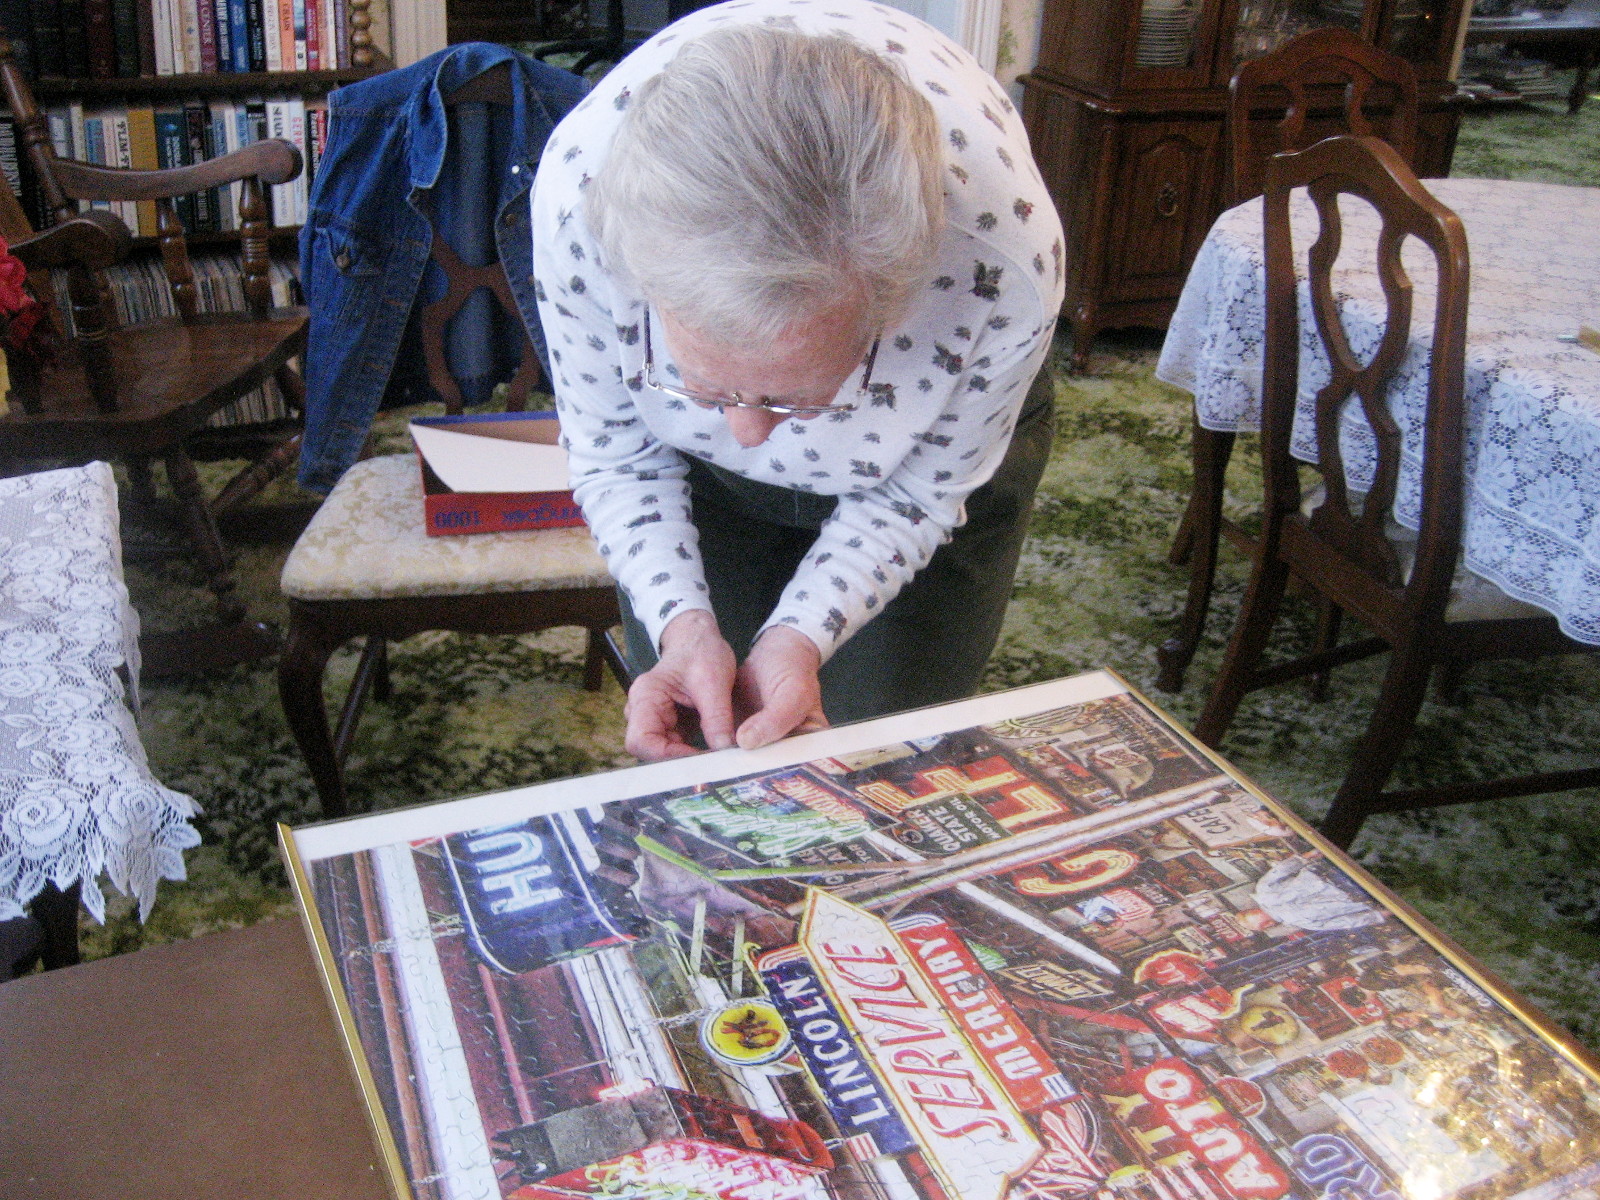
Donna and I spent several days putting the puzzle together. After a time the eyes get tired and one needs to walk away for a rest but it was a lot of fun. The weather outside was not pleasant so it was very fun to be able to do things inside.
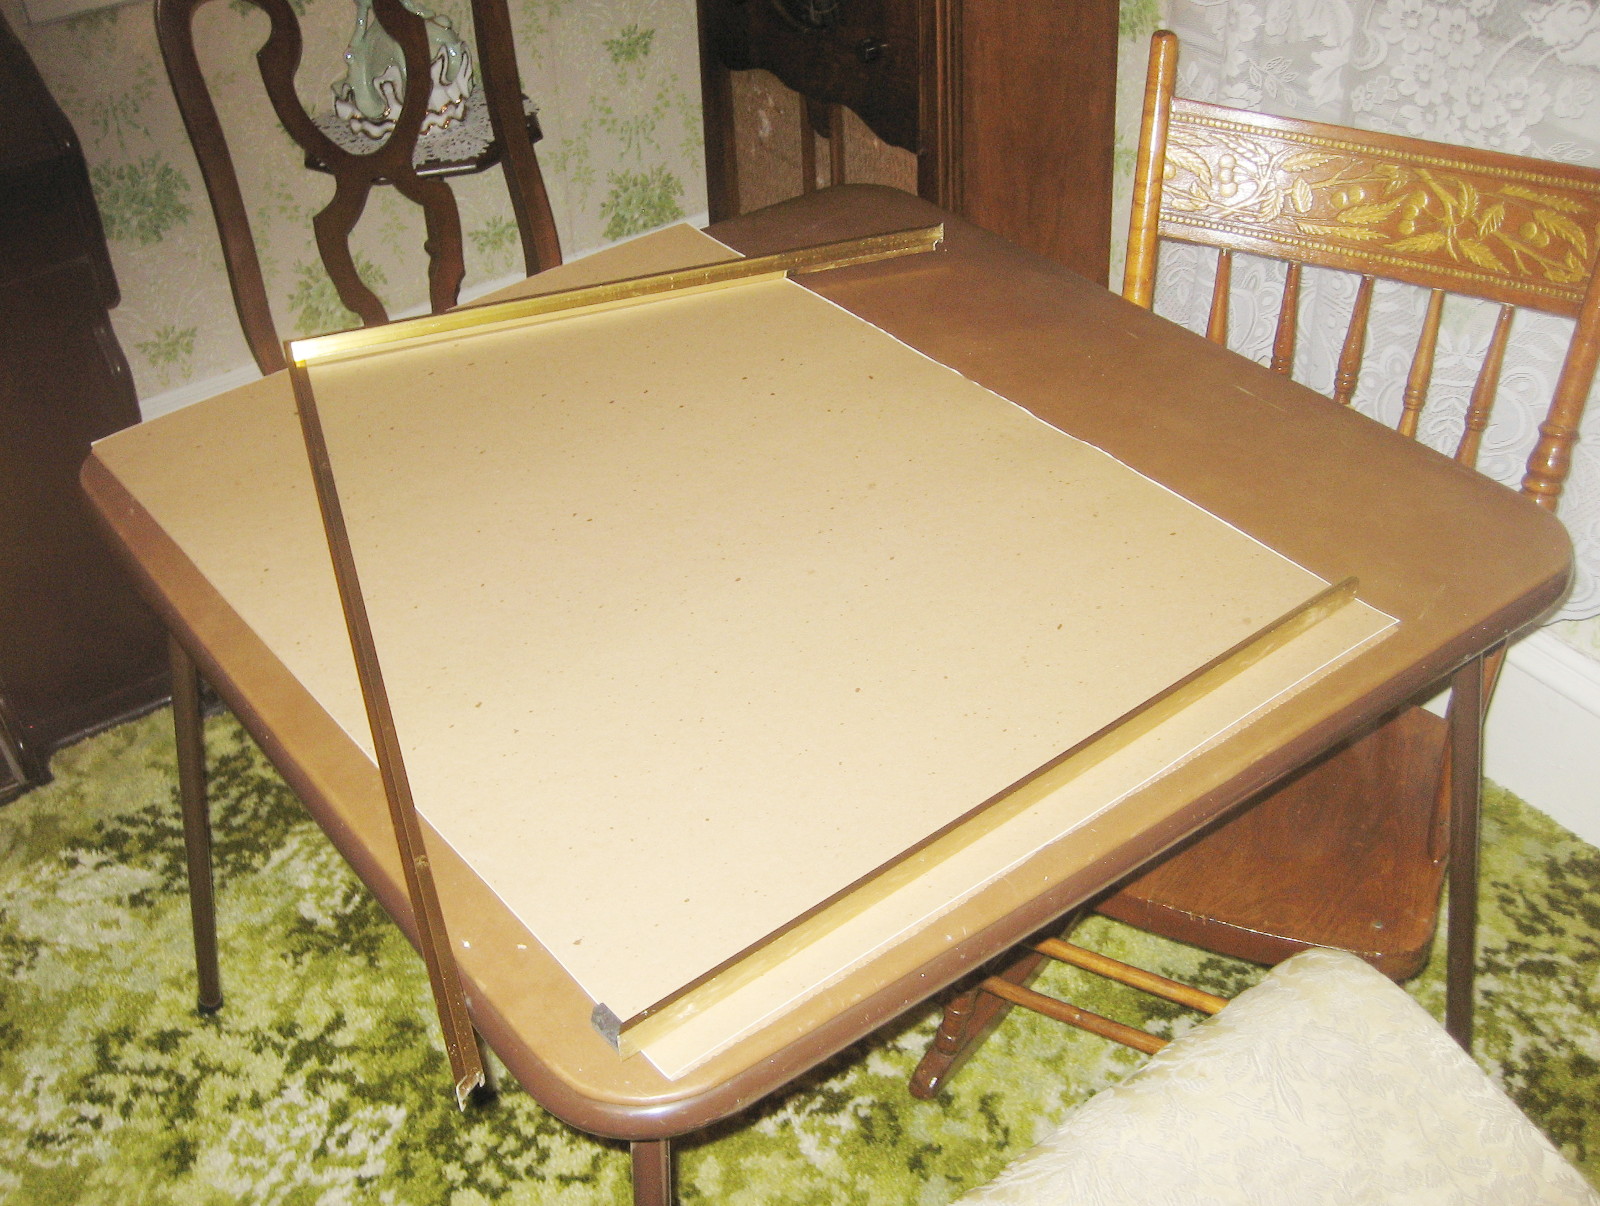
Below Donna is putting the frame together. The frame was a couple of inches wider than the picture so we put a white cardboard strip on each side. The frame could have been narrowed, but then I would have needed to cut the glass and backing also. I just didn’t want to chance messing it up.

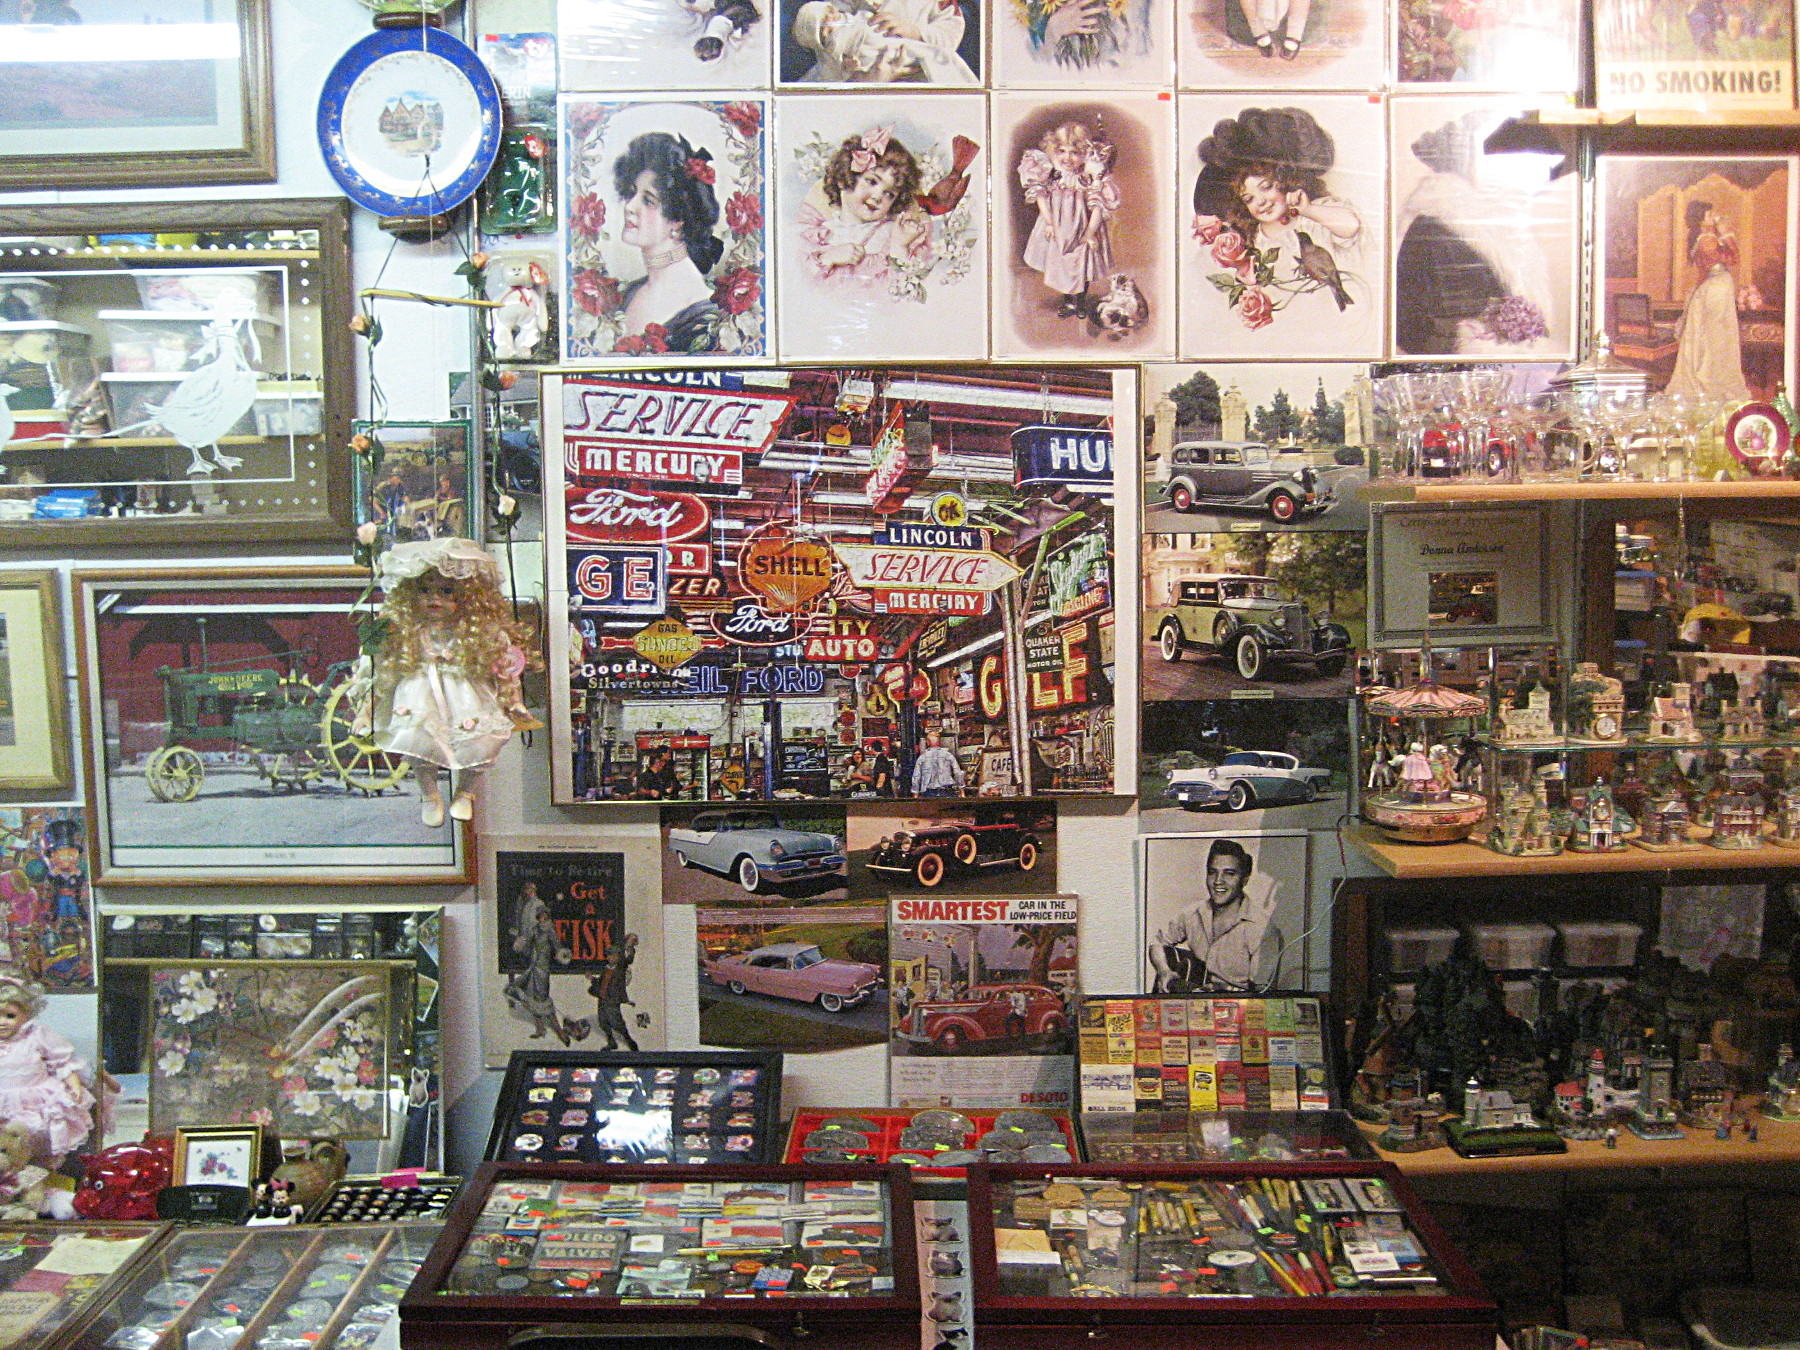
Below is the Puzzle hanging in my shop. I think it looks great. I want to thank you, my Son, you are good at picking things.

Category:
greetings |
Comments Off on A Fun Birthday Gift
23rd December 2016, 10:37 pm
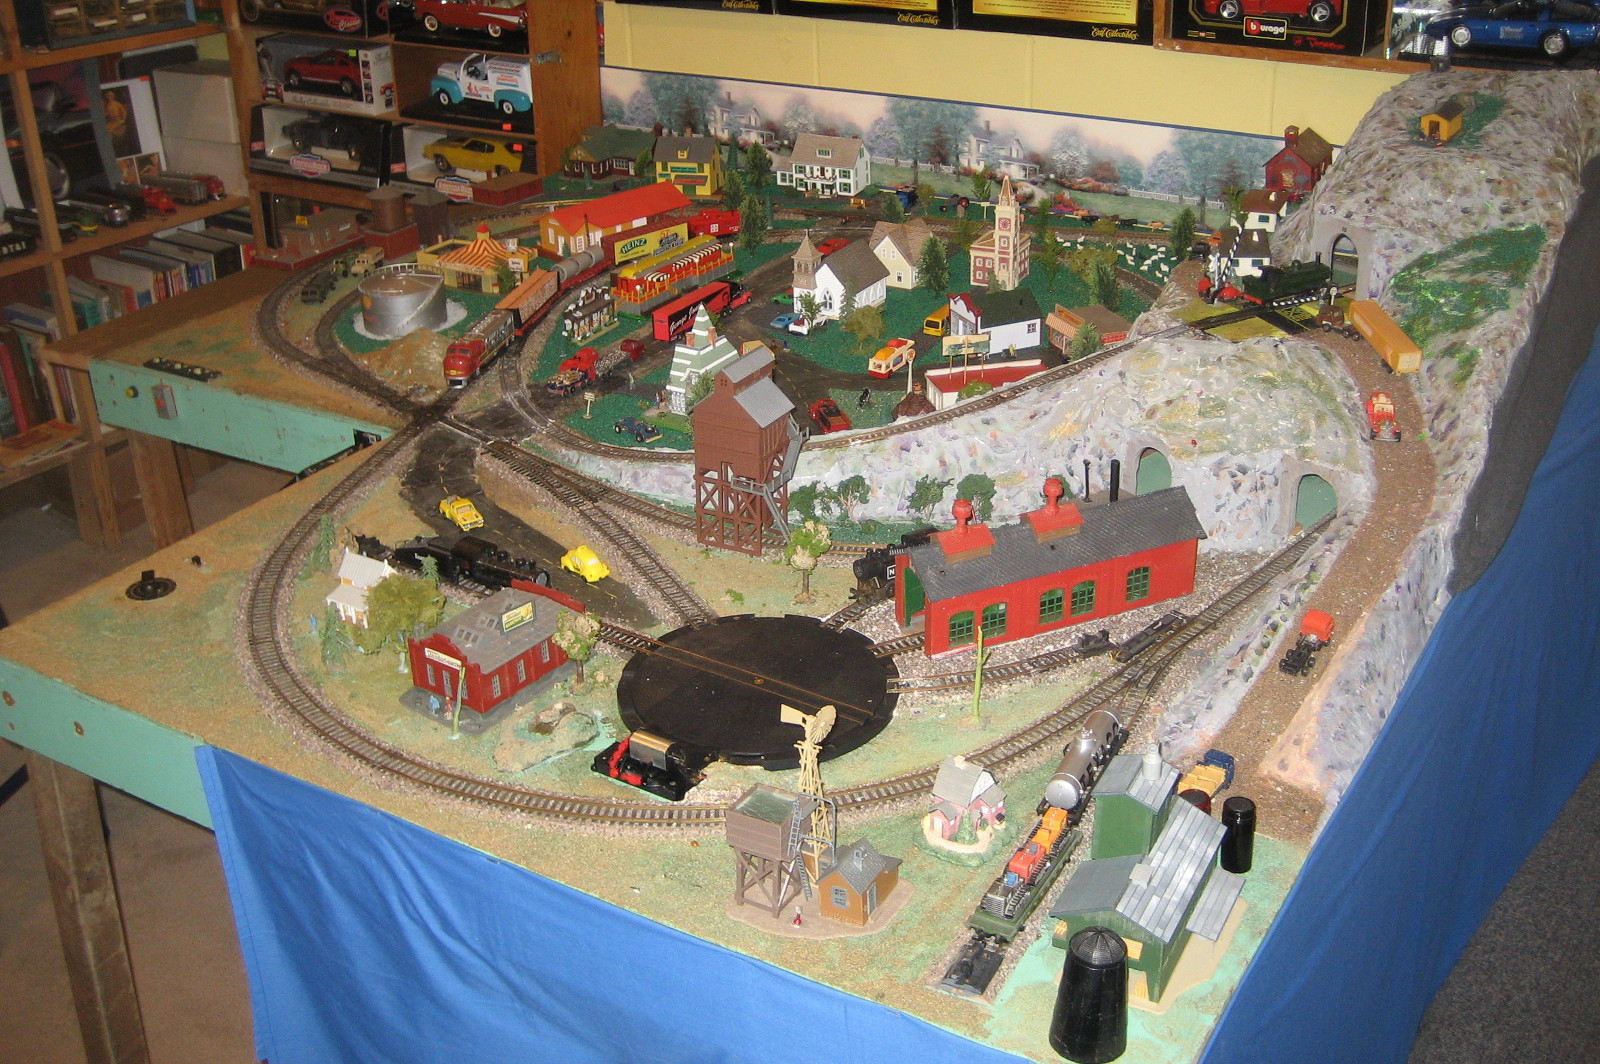
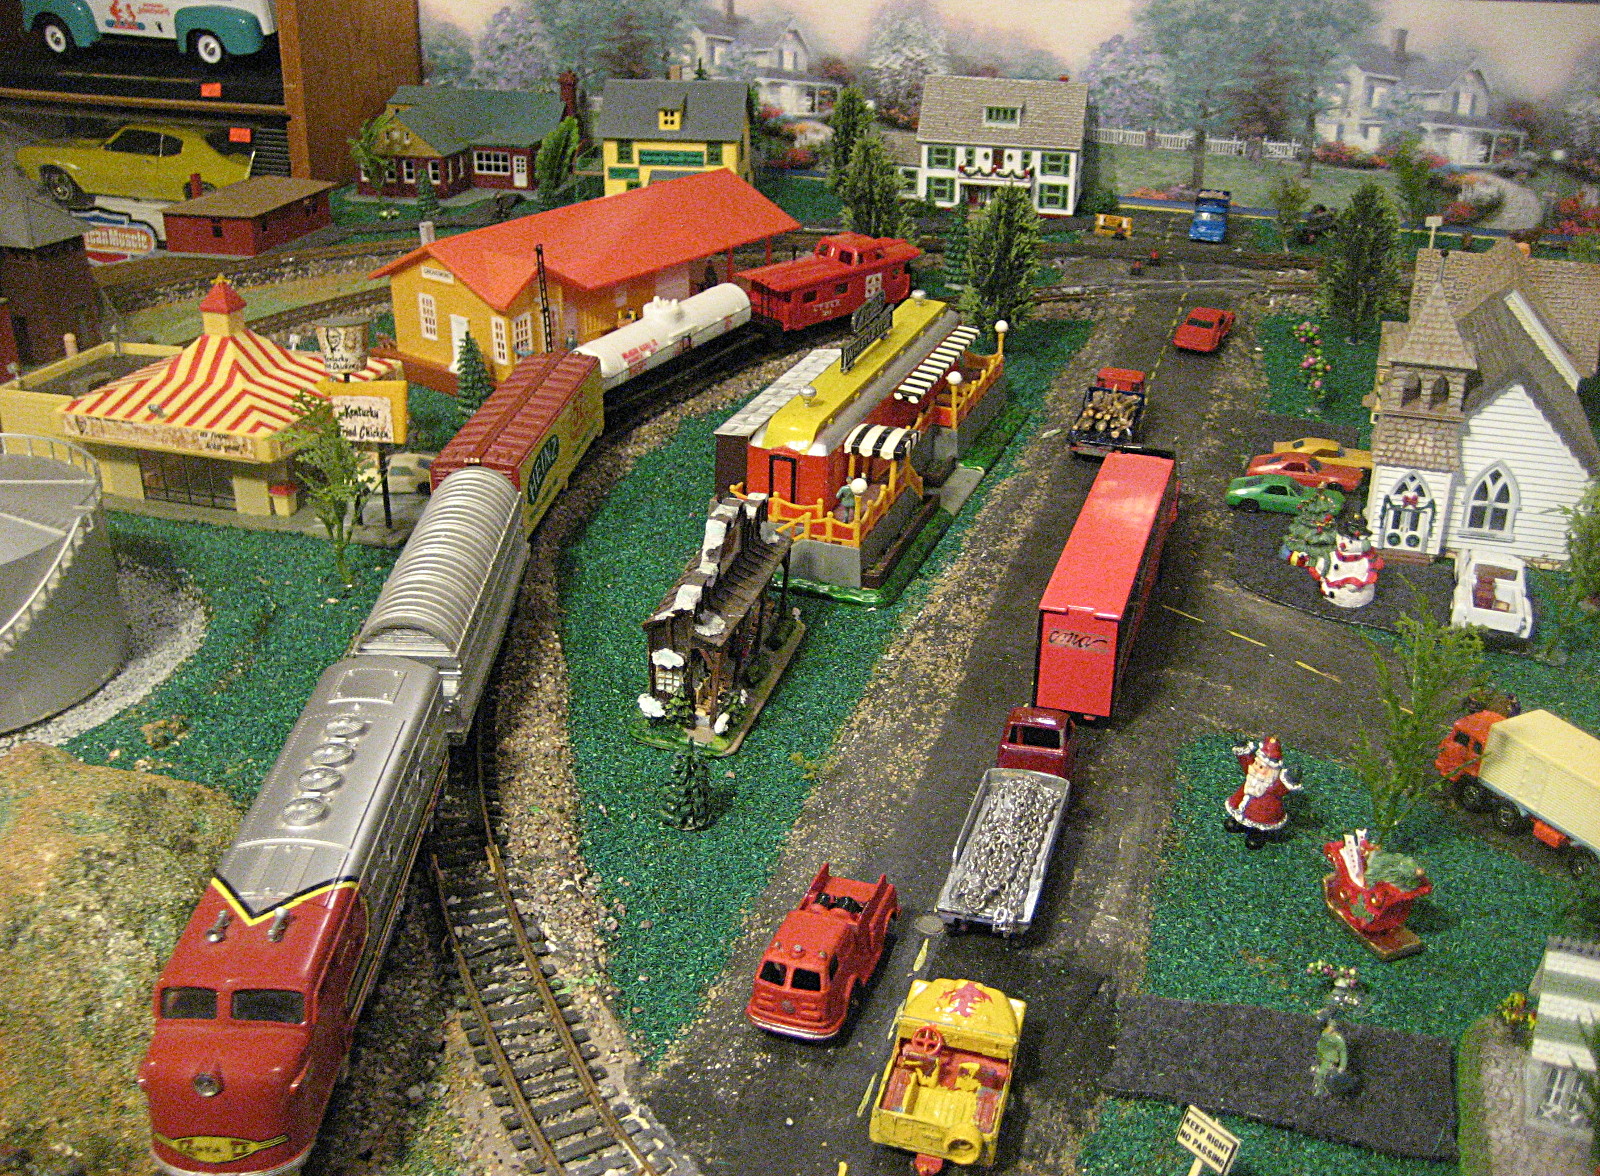
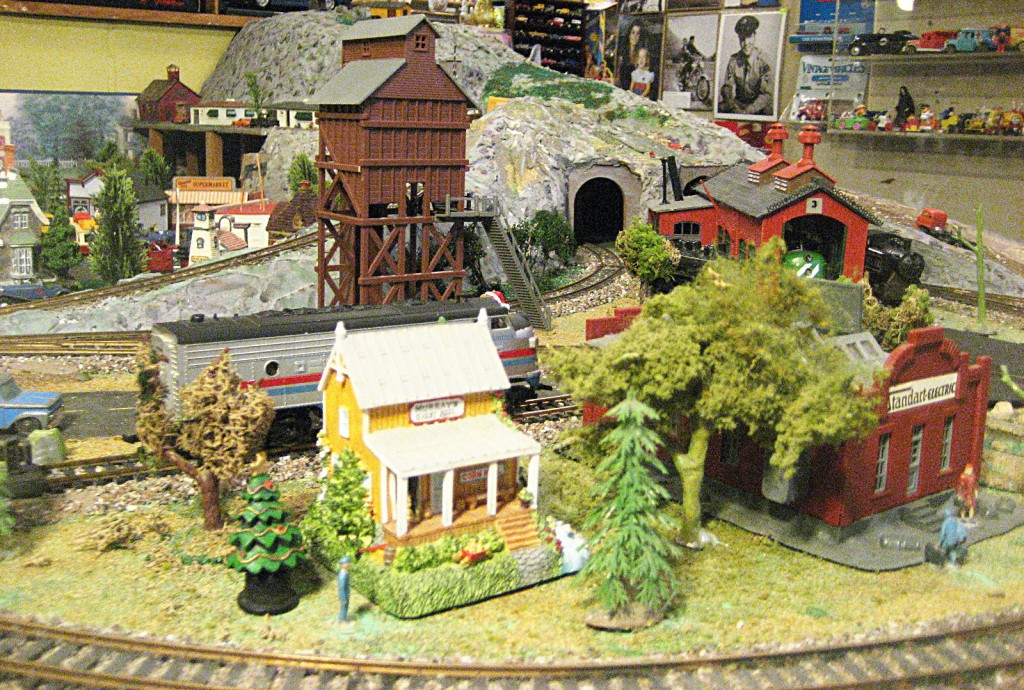
The pictures below are of the old HO train I set up recently in my shop. In my youth I liked trains. In 1946 I received a Marks wind-up O scale for Christmas. In the early 50’s I started building HO model kits. My brother sent me two Japanese brass locomotive kits when he was in Korea during the war. About 1980 my son and I acquired a incomplete HO setup at a garage sale. We got it rewired so it ran and he built, decorated and arranged things. It was sharp looking and took up a big part of the spare bedroom. A few years after He graduated from college and no longer lived at home, the train was packed up and stored in a farm shed. Now his youngest son has a strong interest in trains. I dug out the old board with the tracks on it and rebuilt the set up so my Grandson, Gunnar, can run it. below is the picture of it.

It was a time consuming job setting it up, but it was fun. Electrical connections age and get dirty along with everything else. Me, I build and fix things, but My wife, Donna, does all of the painting and decorating, for she is very artistic. She picked a lot of things to use that we had. You can see in the picture that Santa Clause is even there for Christmas.
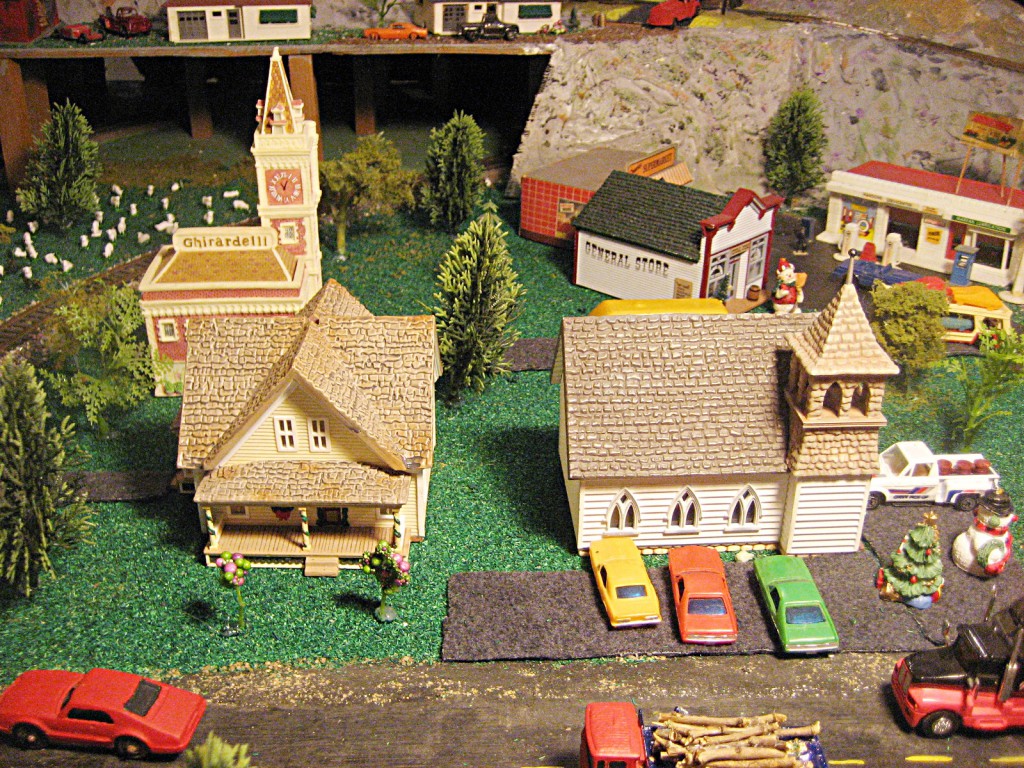
We found lots of fun stuff to put on the board. We had acquired treasures at garage sales and auctions over the years.
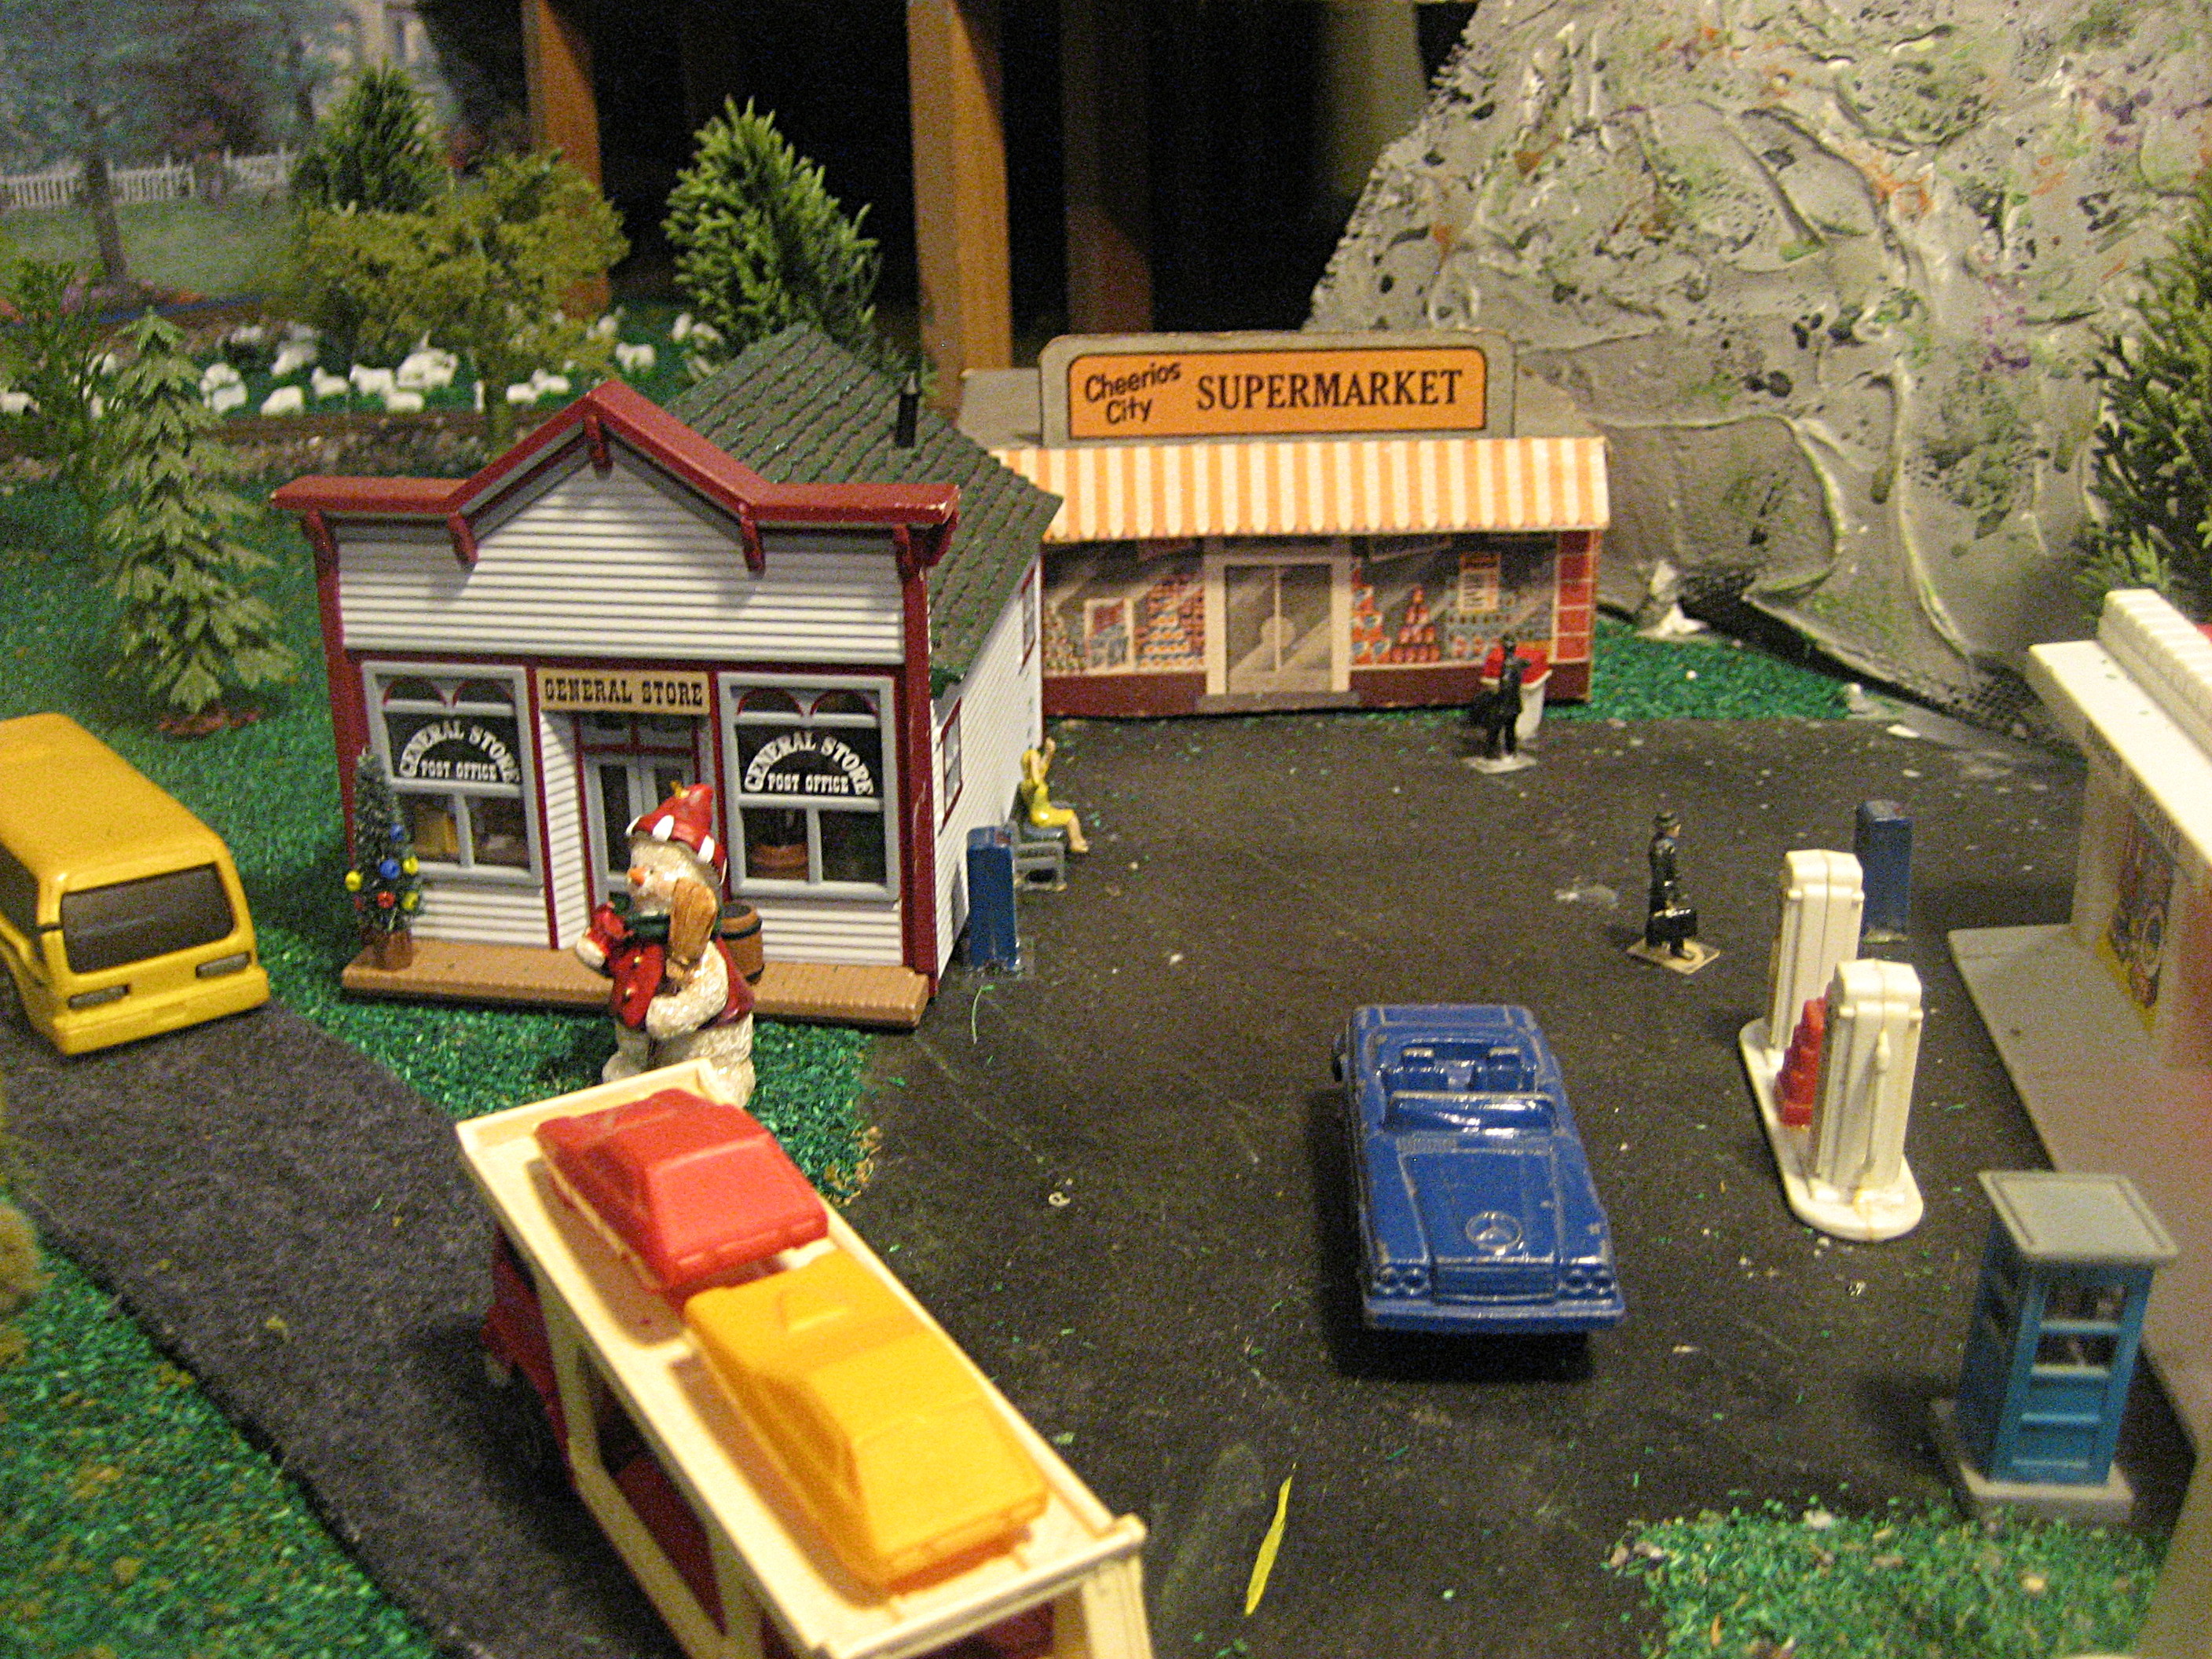
The picture below of the Cheerios store is an old treasure of mine. It was from a Cheerios box in the middle 1950’s. After I ate all the Cheerios as fast as I could, I cut out the store from the empty box, folded it out and glued it together. It brought back lots of memories when I found it. 
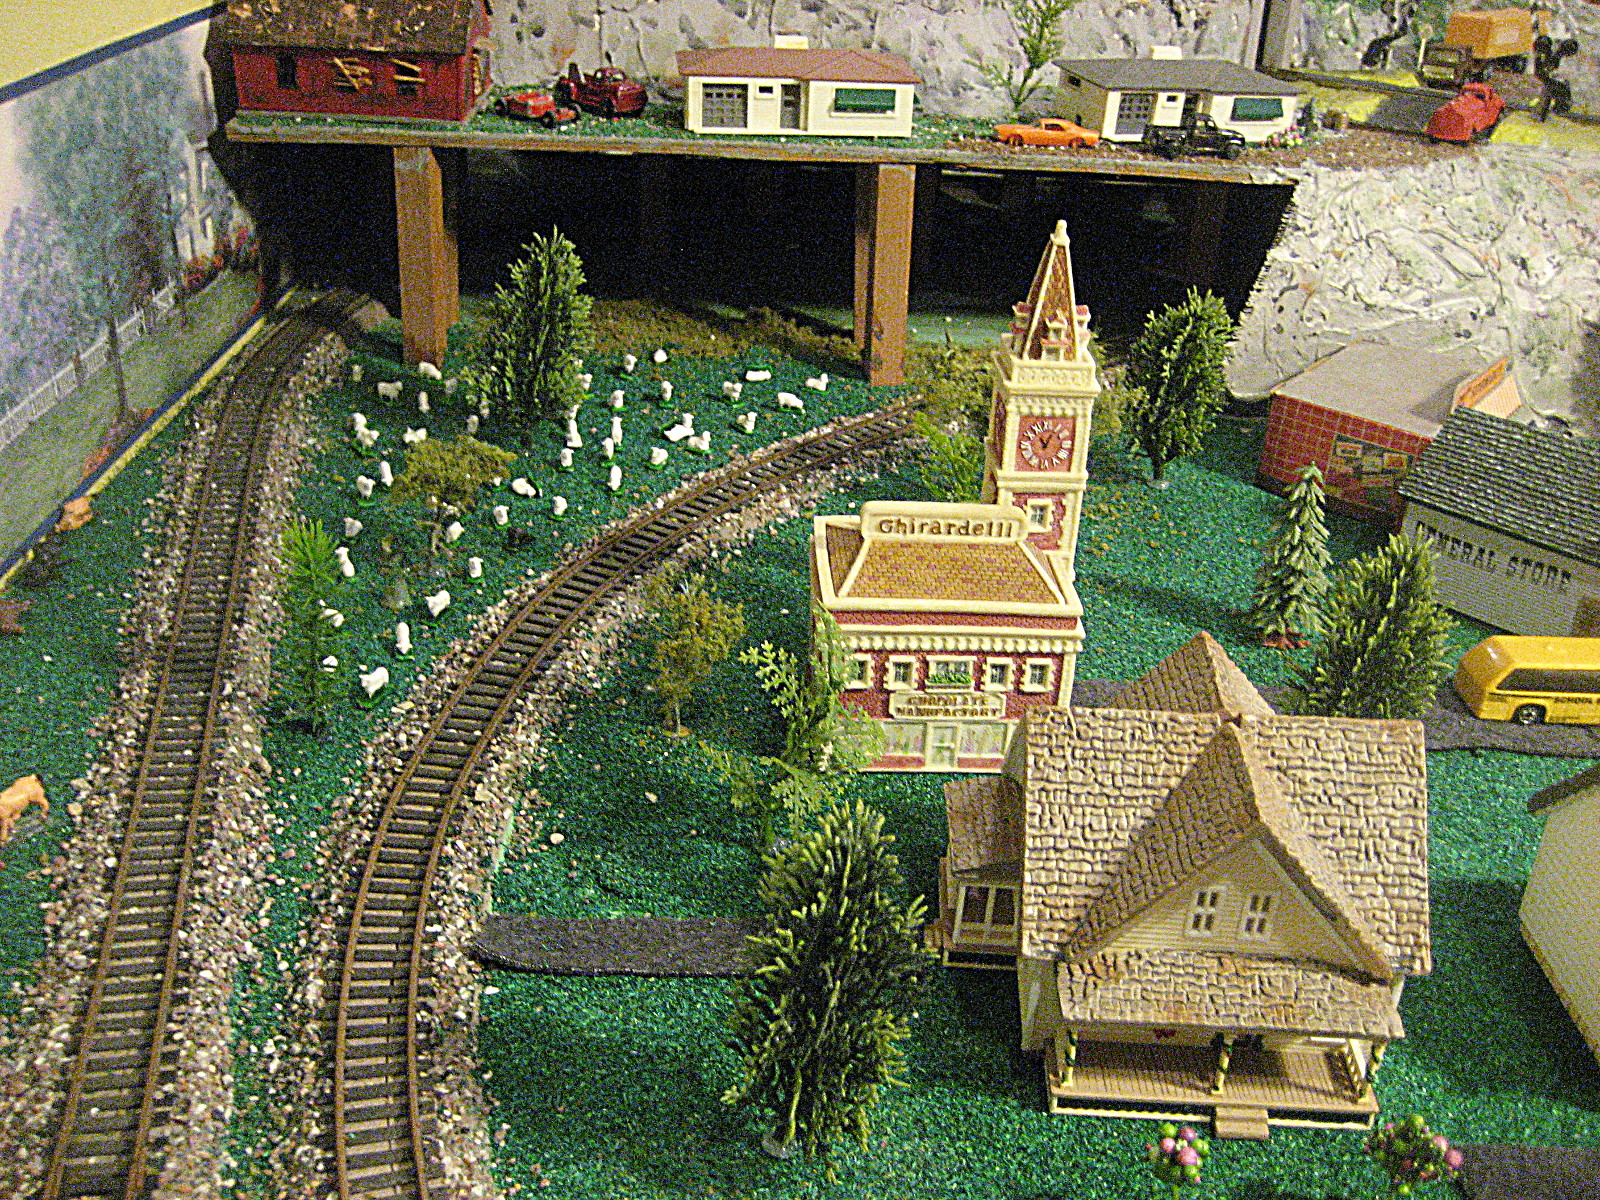
One last Picture, it is of the flock of sheep my wife put in the pasture. We have had a lot of fun with this project. My grandson, who is eleven year old, has enjoyed it very much. He has suggested that I should add more track and area to the set up. His suggestions have made a lot of sense. If it is a cold winter and I spend a lot of time inside, who knows what will develop.
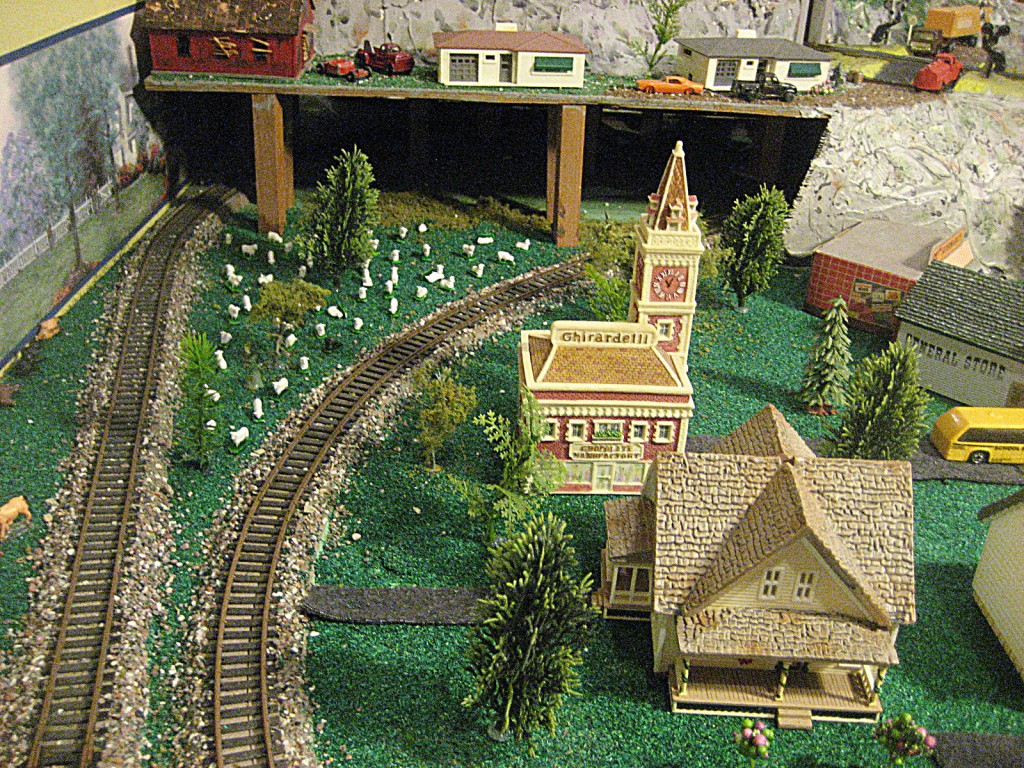
My Sheep on Pasture
20th December 2016, 08:01 pm
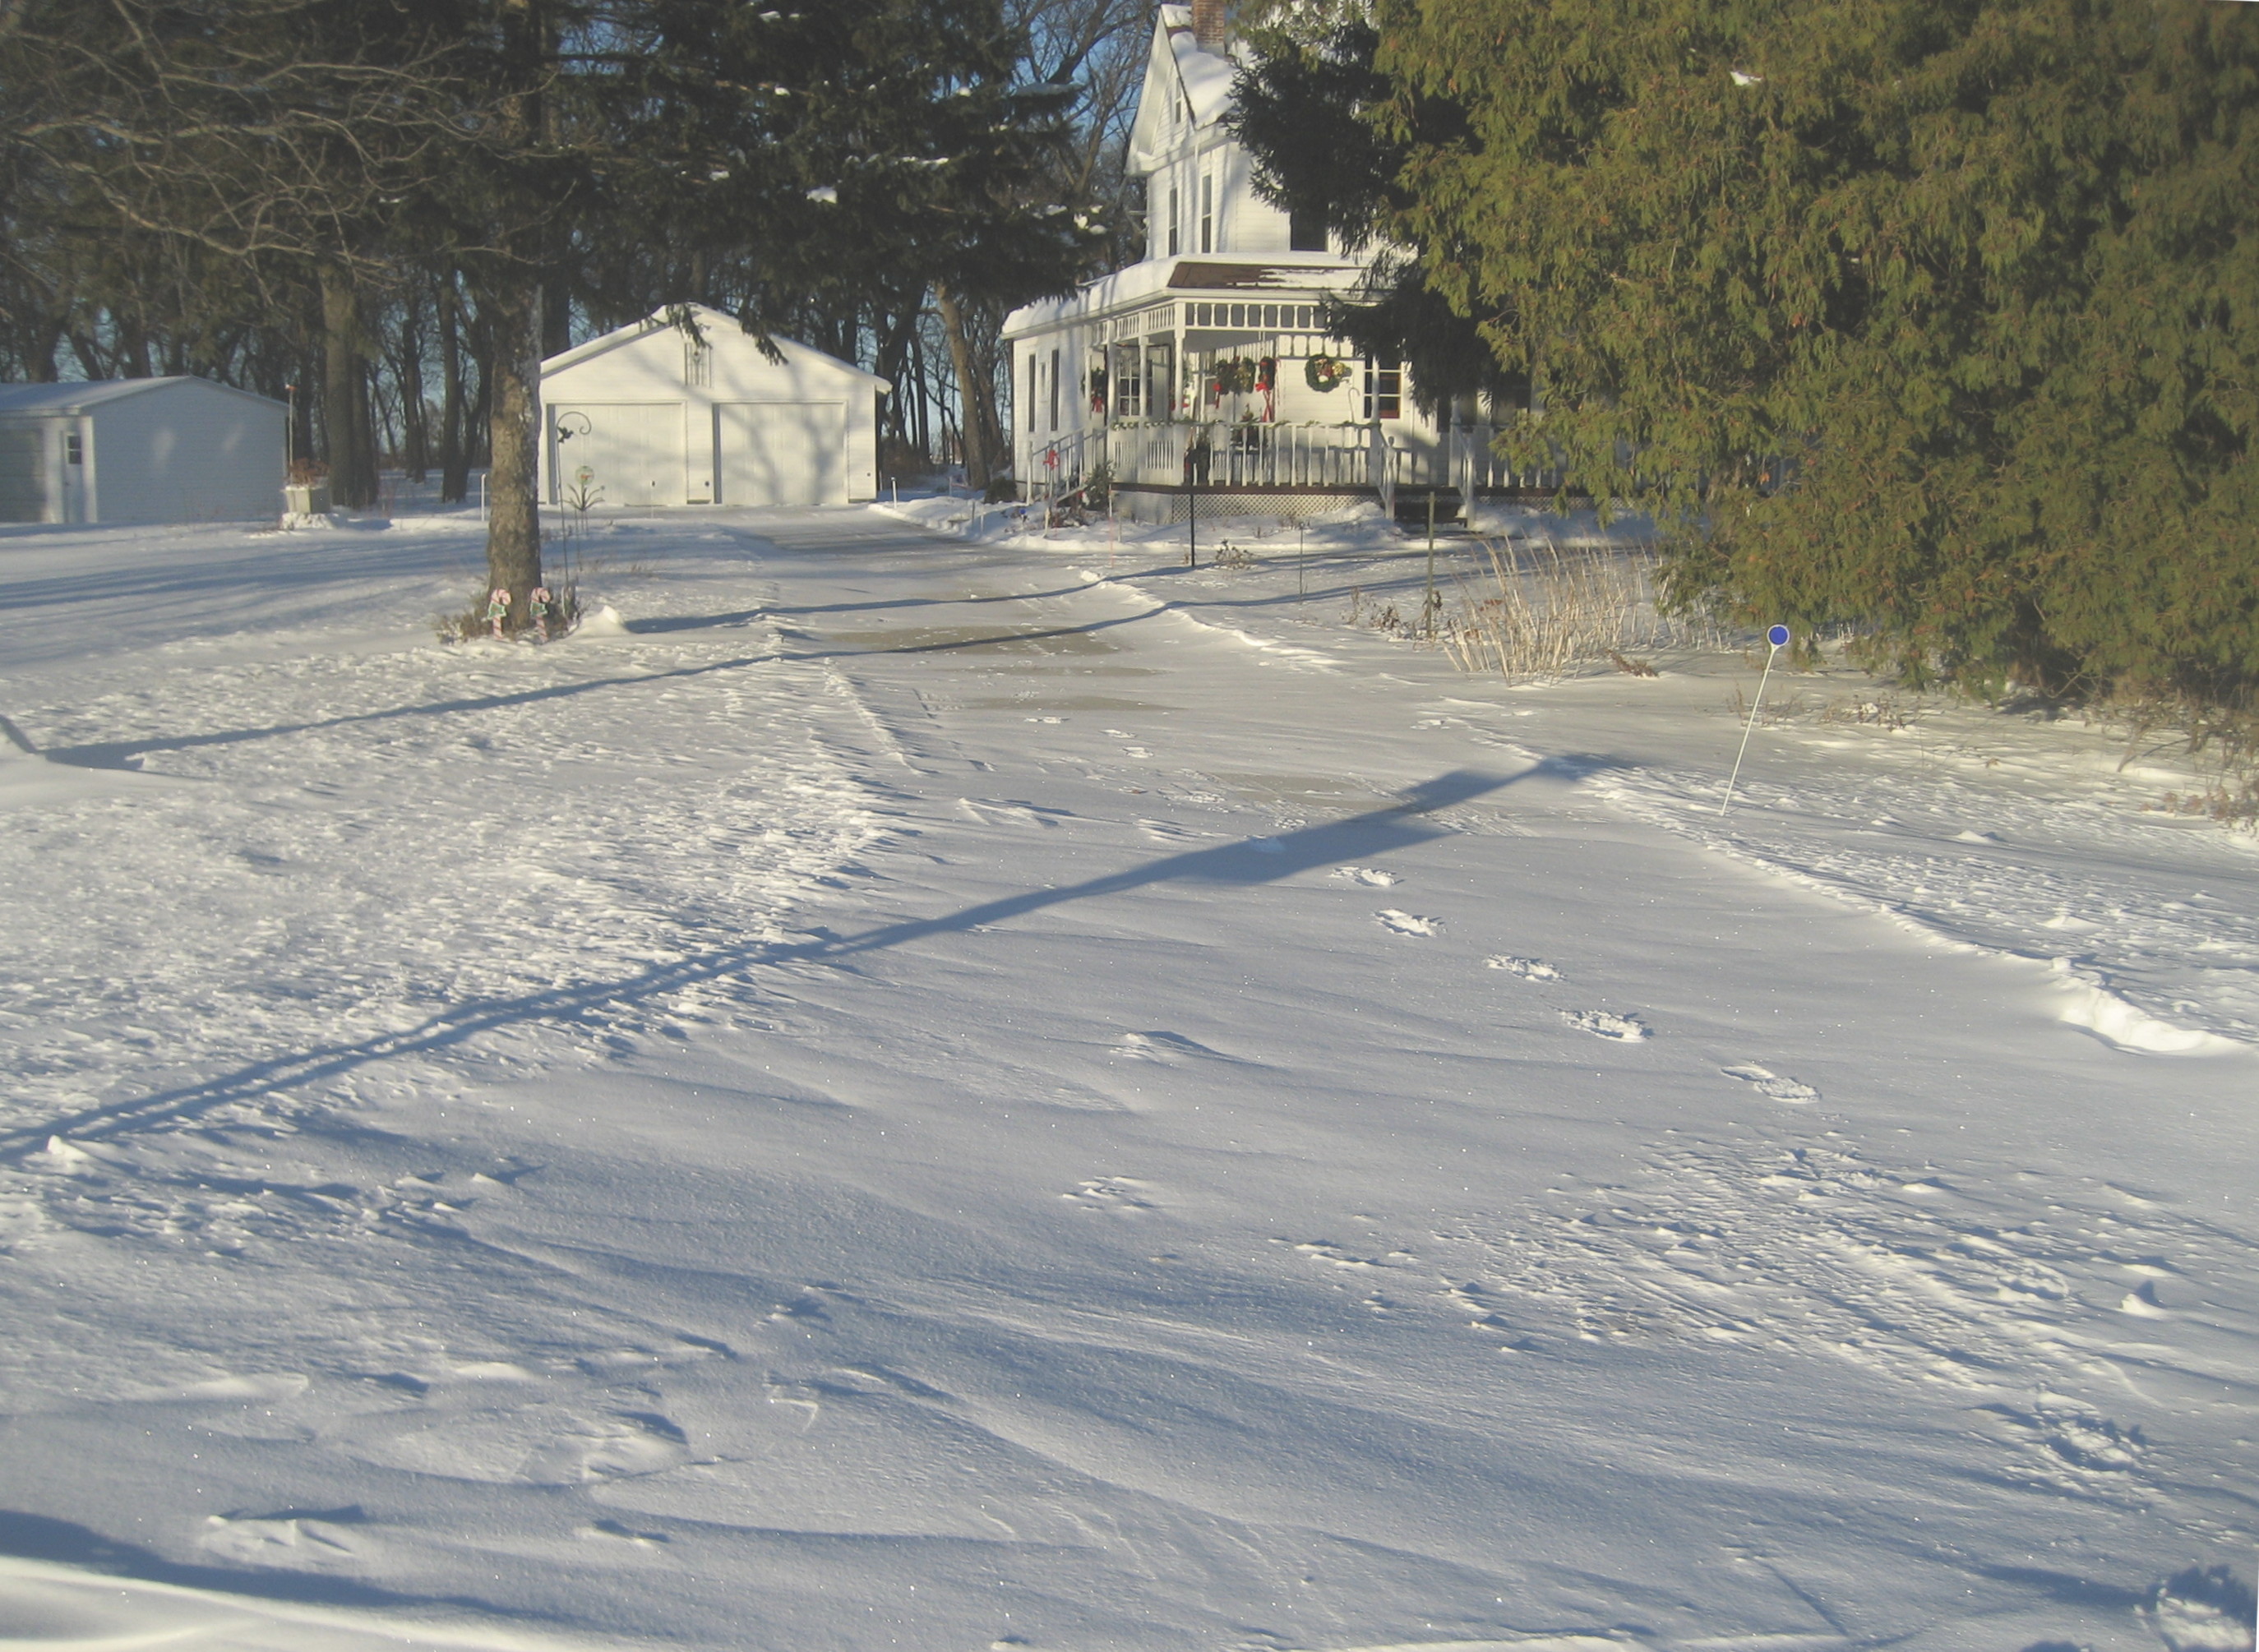
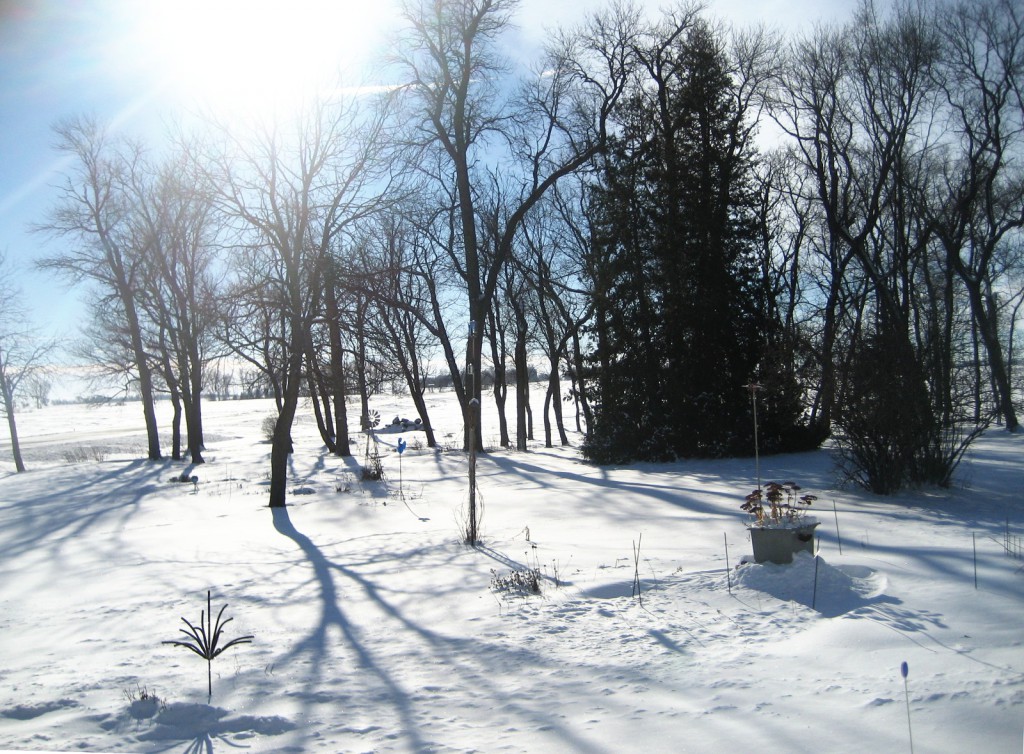
The weather turned nice today, actually it turned nice last night. It got warmer all night long as warm air from the south blew our way. It was windy but it felt good. below are a couple of pictures I took this AM.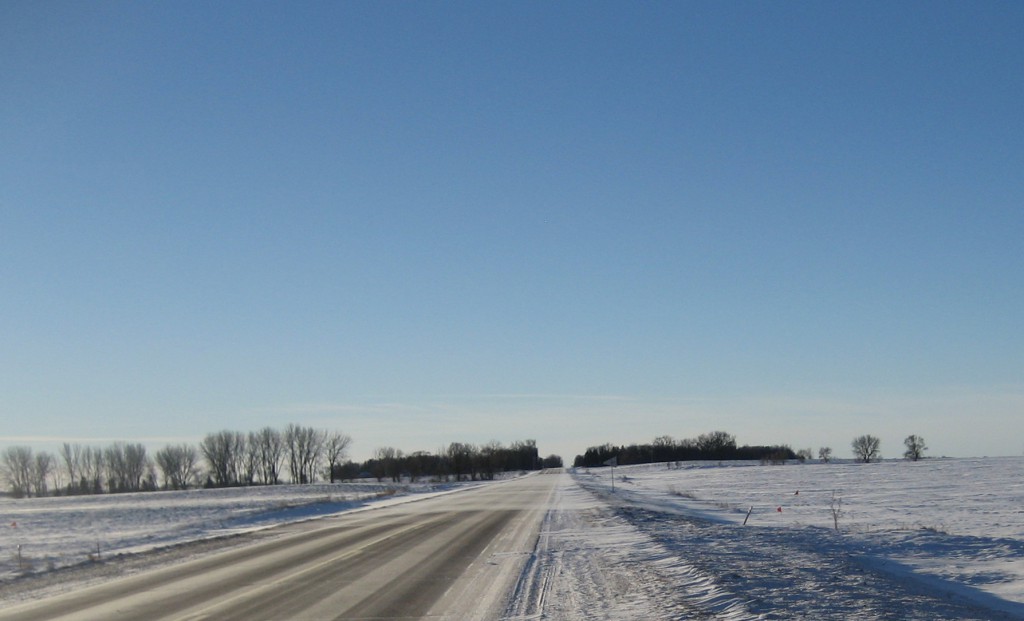 The snow is always moving on these prairie lands, it is pretty to watch, but it does make some work for you, as you can see from the picture of my driveway below here. The wind packs the snow hard, so you get good exercise cleaning out. It does feel good to go outside and be active when the sun is shining and the temp is rising. We had several day when the high temp for the day was below 0 Fahrenheit. That made even shoveling snow today a pleasure.
Category:
Uncategorized |
Comments Off on Minnesota Winter on farm
19th December 2016, 08:43 pm
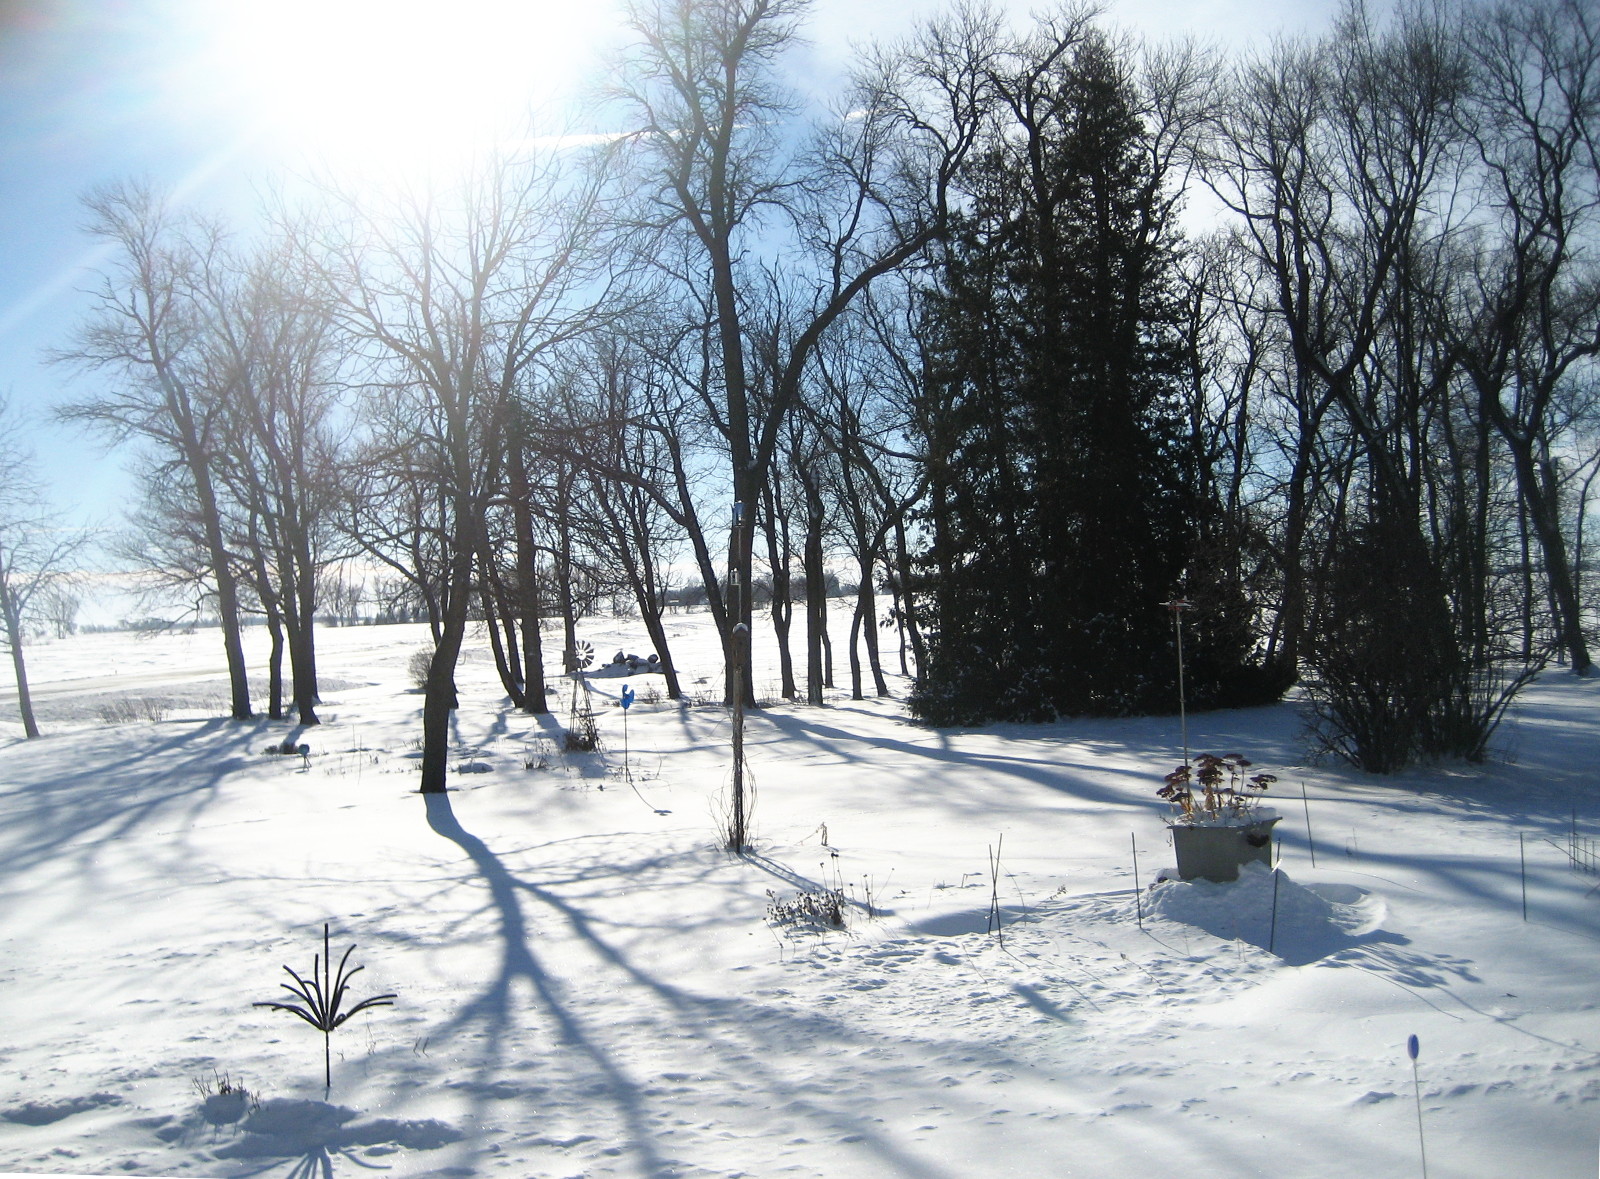
The snow stopped, The sun came out and the wind slowed down. It was a little more than 25 degrees below 0 yesterday, but today the temp climbed above o. Tomorrow it will rise to near freezing.
The sun light is so pretty with the ice crystals in the air. It gives a sparkle to the sky that you don’t see any other time of year.
The snow keeps moving across the fields in this prairie land and the wind always blows. Some time it is soft, mostly it is in the 15 to 20 MPH range. Many times it blows at 25 to 35 MPH and often in blizzards it will pass 40 MPH.
The snow will end stacked in farm groves and house yards, road ditches and fence lines.
I like to watch the snow move when the sun is bright. It is so pretty to watch it drift and dance across the fields.
Category:
greetings |
Comments Off on Winter 2016
10th June 2015, 09:27 pm
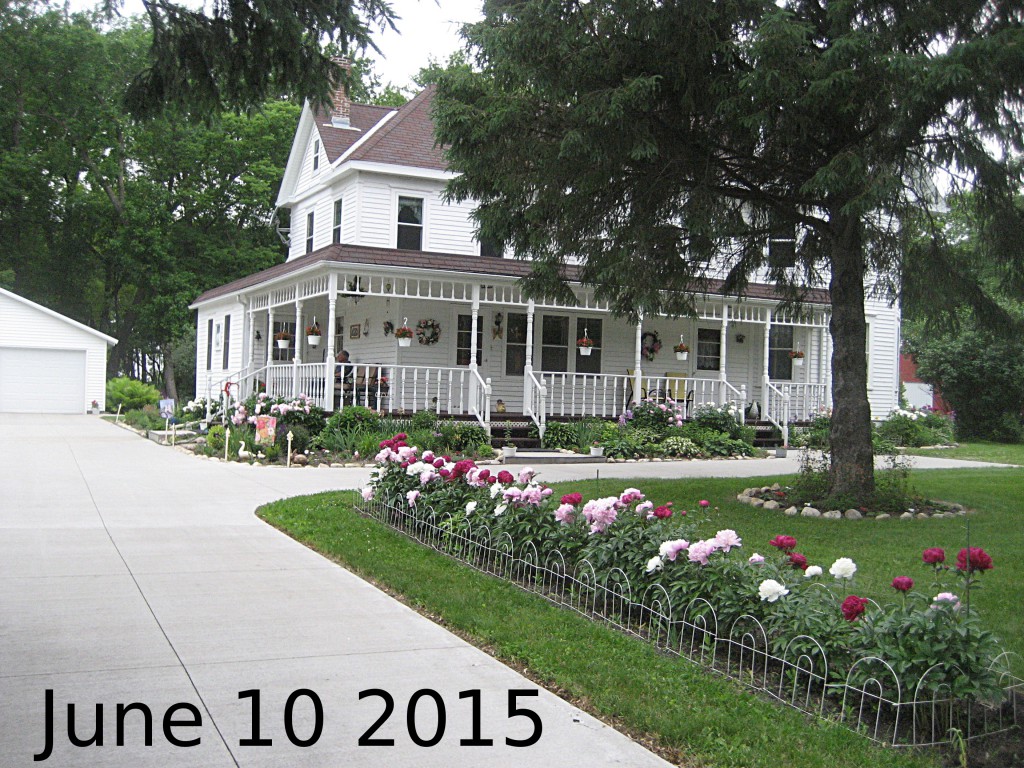
The rains came with warm weather and the days are beautiful. The flower gardens are doing very nicely and the corn field looks all green now. I enjoy sitting on the porch looking out at my world. My wife Donna is the one who creates the flower gardens that I enjoy so much. In the photo of our home, you can not only see the beautiful flowers surrounding it, but also me sitting in my favorite spot.

3rd April 2015, 11:28 am
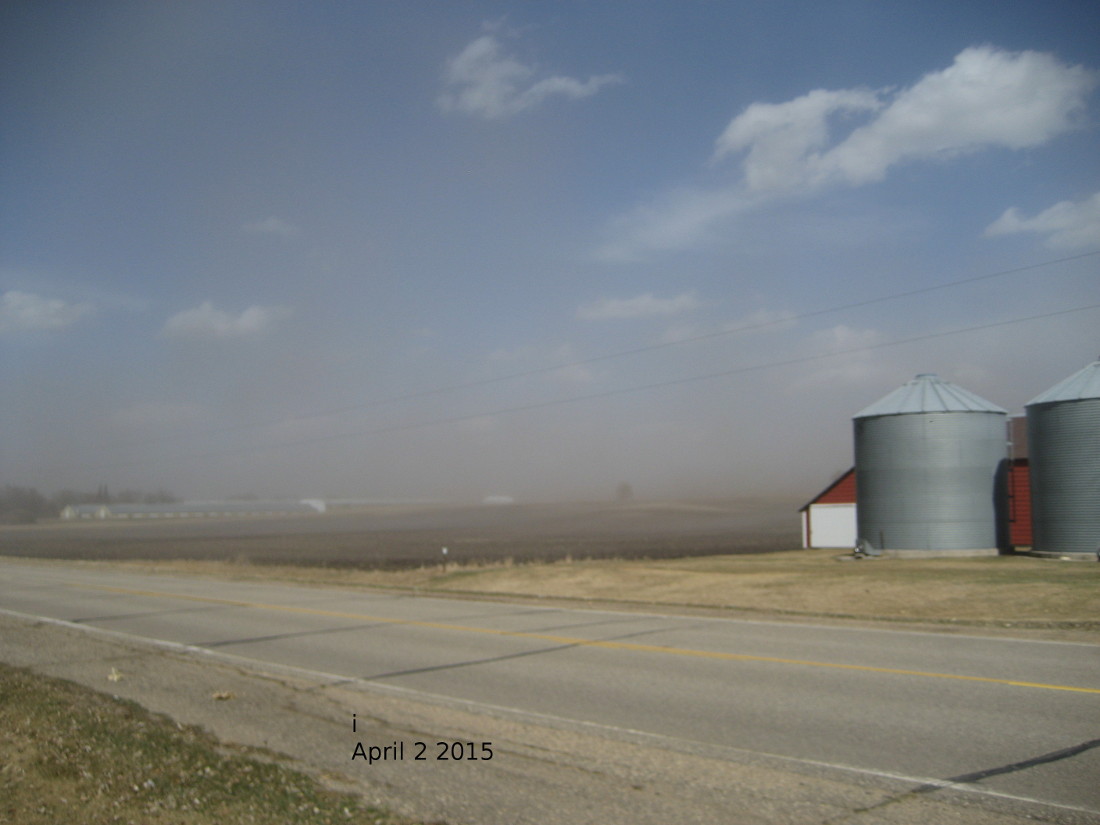
This is a different kind of spring here on the prairies of Minnesota. The last two days were warm, temp up in the 60’s and 70’s. The winds started from the south on Wednesday AM with gusts coming up to 40 MPH by afternoon. The wind shifted to the west by Thursday with gusts in the high 40’s by afternoon. The wind would come in gusts that would shake the trees in my yard and farm grove. Clouds of dust would swirl across the bare fields some times moving cross ways to the regular wind. My Wife and I sat for a time on the porch watching but when the dust swirls came it would make your eye water and cover everything with a fine layer of dust. That does give your coffee a different flavour so we retreated to the inside.
I will have a couple of days of work picking up the tree branches laying on the lawns and in the farm grove but experts say exercise is good for an old man.
3rd March 2014, 12:19 pm
exercise ahead
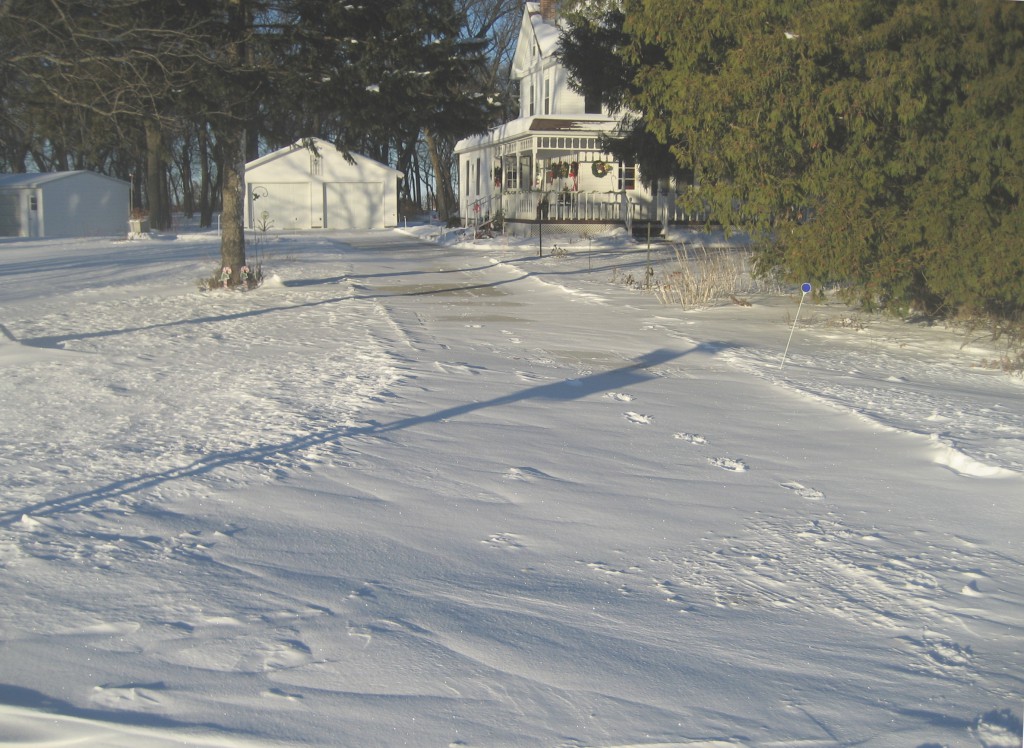
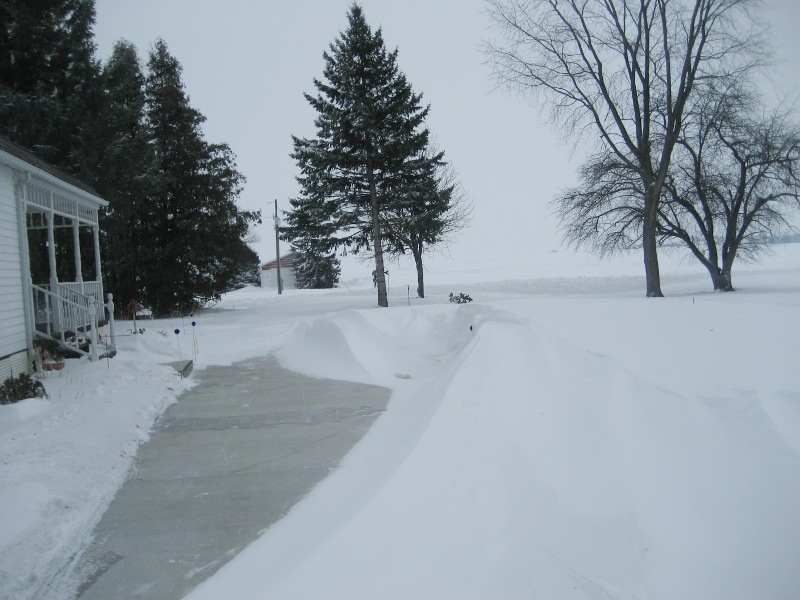
This is often what it looks like in the morning when the wind blows across the flat farm land. We didn’t get any new snow but the wind gusts were up to over 40 MPH the night before I took those pictures. You can see how it swirled around the house and swept some arias clear. These pictures were taken a little over a week ago. We had one more 6 inch snowfall after that with high winds but I didn’t take more pictures. Keeping the driveway open becomes strenuous exercise. I use a walk behind snow blower which works great when the snow is only a foot or two deep. The deep drifts require some work with the shovel.
The wind had dropped down to around 20 MPH when I took the pictures so it is still a white world in the open fields as you can see in the background of the photo.
Looking in the past, March is either the month when we get lots of snow and blizzards or warm spring weather. I have vivid memory’s of both.
It is the 3rd of March today and we had 17 degrees below zero last night.It has brightened up outside and the temp is up to 12 above zero Fahrenheit. That is -27 Celsius last night and -11 Celsius now. The forecast for the coming week isn’t good but I am still hopeful.
I am looking forward to the green world that comes with spring.
30th January 2014, 12:29 pm
It was 16 degrees below zero the other morning so I decided to avoided being outside for the day. I started sorting through some old Erector Sets I had tucked away. When I was a young boy they were my favorite toy. We had no TV to watch and radio didn’t totally fill your mind. With the Erector Set I would be totally occupied.
My oldest brother was 18 years older than me and he had left Me a fairly large Gilbert Erector Set. I also received two or three newer sets. A very small one to start with, when I was about six, then bigger ones as I got older. These I of course saved. Then in my adult years, I would stop at Garage Sales and invest in Erector set parts or partial sets if the price was right. Then these would be brought home tucked safely away and forgotten.
I have spent some time before sorting and cleaning parts, but I still have a way to go. I dug out a batch of stuff that morning, as you can see in the photo below.
I wasn’t quite in the right mood for sorting and cleaning. As I looked at the parts, I started to see a truck.
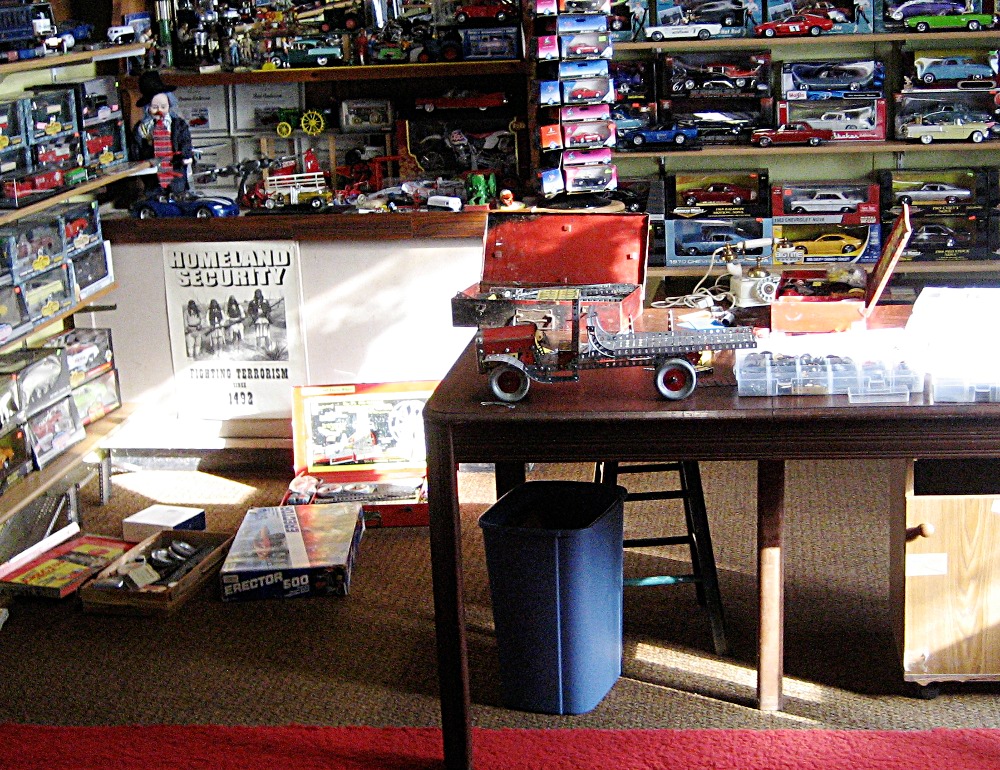
Erector truck among the parts
It was like being back in time. I had only my imagination to guide me. I put pieces together and dug through the parts for ideas. I did back up a few times to do things a bit different. By dinner time I thought it was looking pretty good, so I brought the camera out.
When I was a small boy there weren’t many toys in small town stores. The last page of the Gilbert Erector Set instruction book had a list of parts you could order. So one year with my birthday money I searched the list and ordered The hood and radiator. I don’t remember ever ordering anything else but I am sure I did. Mail order was fun. It was exciting waiting for the Mailman to come by every day.
This picture shows the red hood and chrome radiator on the truck. The hood has a lot of patina. I used it many times, not only on trucks and cars but to cover the electric motor on stationary set ups. I have never seen it in a set but it must have been once.
On the right side of the picture are plastic boxes where I have sorted out small parts. This is my attempt to bring some order to my collection. Many times the Erector parts I bought were mixed with other toys or just in bags or old boxes.
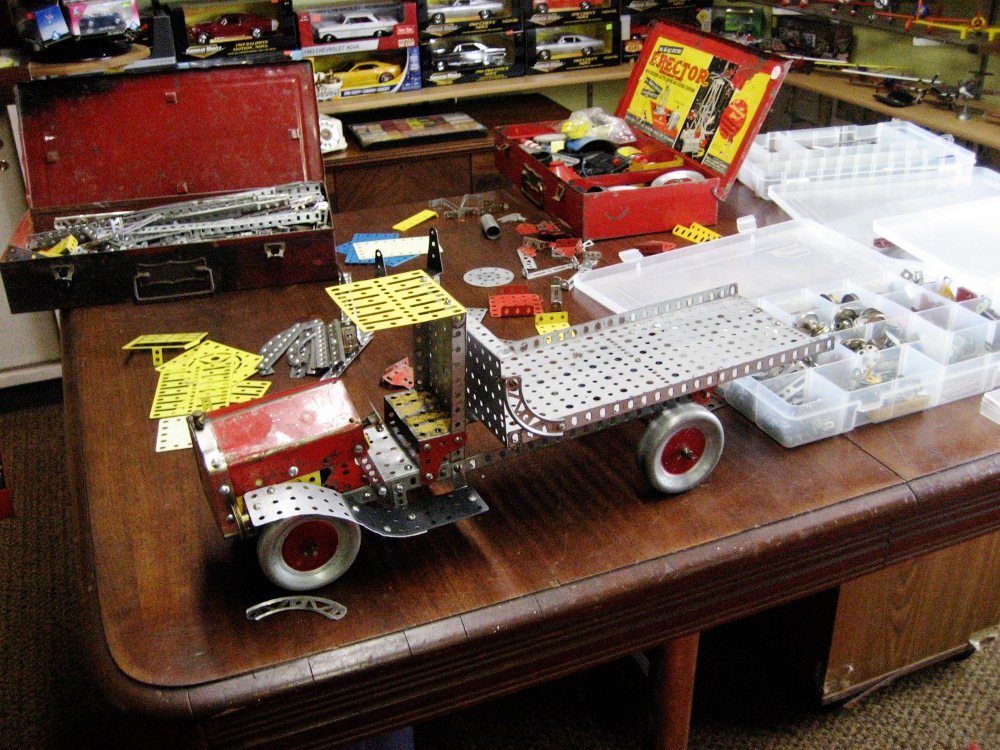
Erector Truck in Progress
The picture below is where I did the assembly work. I can sit in a comfortable chair and I have an electric heater under the desk by my feet. It is an excellent spot on these real cold days. My fingers aren’t as nimble as they once were. Putting in the small bolts was a bit more time consuming than it used to be. I wish I had taken more pictures but I hadn’t planned ahead. I would assemble pieces and then take the truck back to the table with all the parts and search for what else i could add or change. It really was enjoyable just following your imagination.
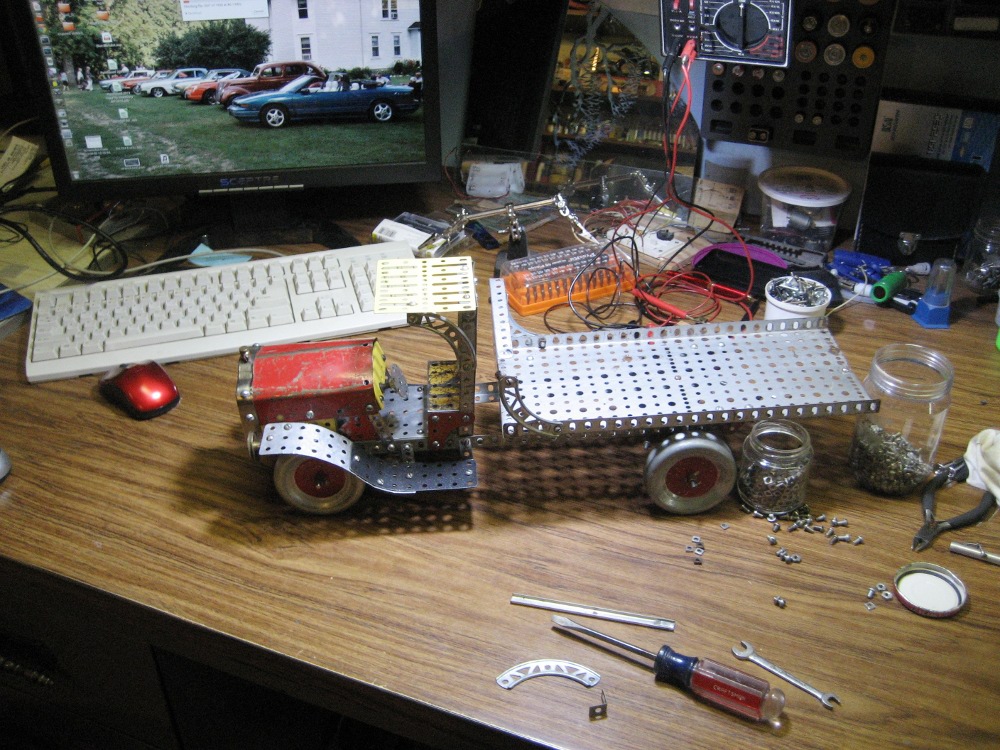
Erector Truck in Workshop
The picture below is where I displayed it among my other toys. I can enjoy it more here then when it was just parts tucked in a box.
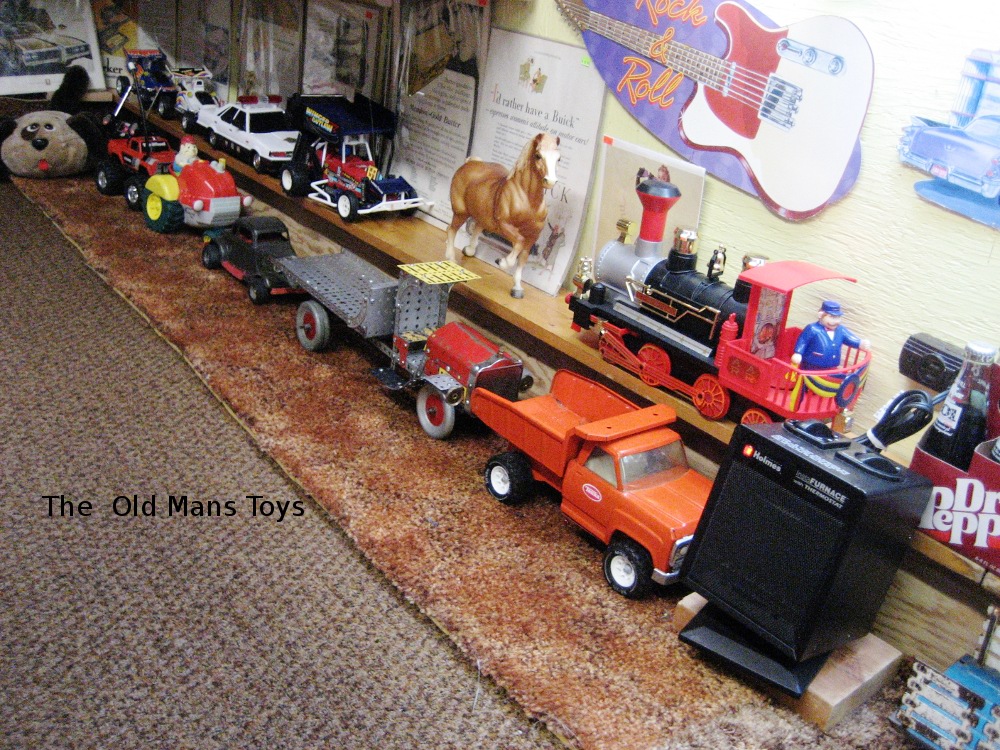
Now Part of the Fleet
26th January 2014, 06:02 pm
I couldn’t resist taking another photo today. The wind has come up to 35 MPH with the gusts reaching 53 MPH. The temperature on my thermometer has dropped to 0 degrees. As you can see by the picture below one wouldn’t want to be out in an open aria.
This pictures and the one below were taken from the same location. Both are looking north past my grove, down the county black topped highway. I am quite sure the road is not blocked by snow, but it would be very difficult to stay on the road judging from the visibility.
The forecast is for a low temp tonight of 17 degrees below zero. That puts the wind chill at a -40 degrees.
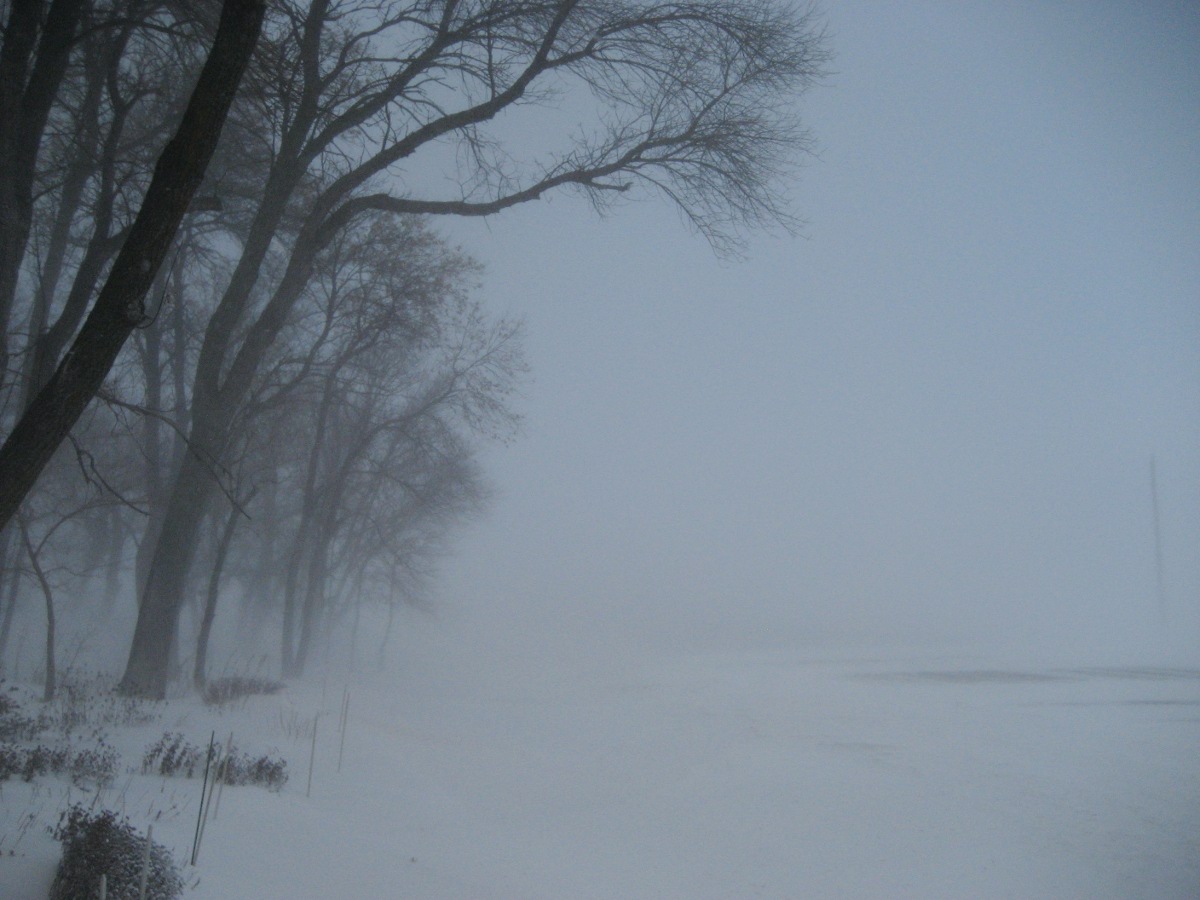
4 PM 26 January 2014